Showing posts with label Techniques/Strategies. Show all posts

Monday, May 13, 2013

Farewell Epith ~ 1.11 Gems in One Week


Well, my one week stay has come and gone and as I stated before, I thoroughly enjoyed myself noobing it up on an unfamiliar server.  I came in with nothing, used no SparkCash (aside from a Beauty Shop Coupon), and am retiring with a decent amount of money in the bank.  My inspiration for this whole journey was the numerous postings I see complaining about how expensive it is to get established on a server, I intended to prove otherwise, and I think I've accomplished that.

This post is actually a week late, but I haven't logged back in to Epith until today for the sake of taking some screenshots and doing some last minute vending.  Keep in mind too that this was before the recent patch that increased dungeon drop rates tremendously, your results now should actually be better.

So how did it go?  Pretty well I think.  A lot can be learned for the budding adventurer here.  Hopefully someone will be able to follow along with what I did and get themselves set up to be financially successful in whatever server they choose.

Where to begin?  Well with the sword and shield of course!  Starting from scratch, the Fighter is the best choice for the new adventurer who finds themselves with nothing but lint in their pockets and a mystery vault in their inventory.  With the highest base HP and DEF along with decent damage even with a 1H, the Fighter class is truly ideal.  Remember, this is starting from zero, if you're financing gears using another "main" then your experience will be different.


The Build: The build I used was full STR.  I wanted as much damage output as possible to make up for the fact that I will not be enhancing gear into the "break" point of enhancing, that meant a maximum of +5 on my one-hander.  With how I planned out this character along with other alts to do my alchemy, the STR build was fine.  If you want to add some DEX, END, or SPR, by all means, that's your choice.  In my opinion, it's easy to add Aim/Evasion/HP/DEF via T1 or T2 buff scrolls, no need to alter your build to boost these.

The Empowerments: Since this character will only be used for farming low level bosses using a sword and shield, I fully empowered Slice and Dice for both damage and cooldown.  Remaining points could possibly go into Concussive Charge duration.  Again, she has no other purpose than low level farming.
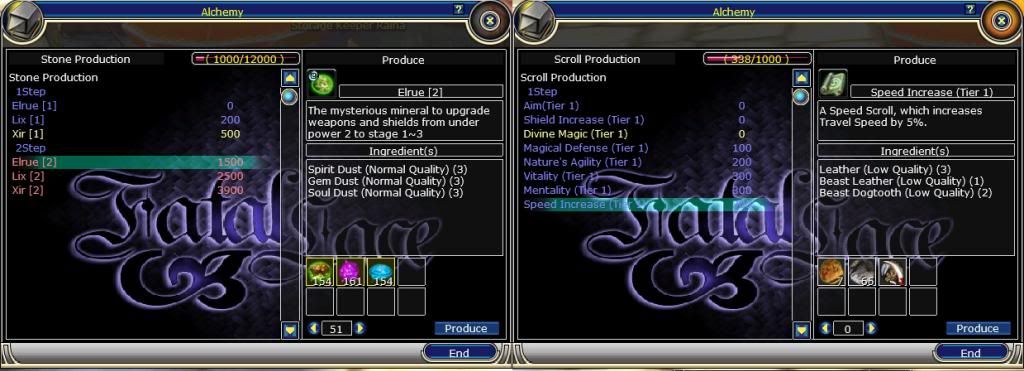

Crafting: Potion crafting needs to be started immediately.  Since potions become the life-blood of the "farmer" character, my Fighter needed to be able to make these while she was out adventuring.  Stone production and Scroll production I left to two other alts that did nothing but stay in Roumen to craft these items from materials transferred through storage.  All the scrolls and potions I crafted, I kept for my own use.  Stones were also made, but I did sell some T1 Lix to add some additional income.  If you are ahead of the game and get on your crafting early, this saves you a tremendous amount of money.  It also keeps you alive out in the field, making your adventure time longer and more profitable.  I'm also on the cusp of T2 Elrue which is exactly where I need to be given my character's level.

What I Didn't Do That May Surprise You:  Many people suggest farming the Ratman repeat for easy money being that you can sell the town scrolls and what not.  However, since I only had a self-imposed one week deadline, I needed to make more money sooner.  I did do the Ratman repeats for the EXP gain, but banked all of the town scrolls.

Academy Rewards:  As stated in a previous posting, this is essential to getting yourself geared early on.  I was able to join a good academy that had excellent rewards, all told I was able to earn 12.6g leveling from 10-30.  It could have been a bit more, but my academy's funds dried up by the time I hit 29.  I had one level with no reward and another level with a fairly small 300s reward from another academy.  I stumbled upon the first academy by chance, they were roaring to join, so I did.  Thankfully, their rewards were true to what they were advertising.  You can also check the rewards for your academy at the Guild Manager in any town.  Be advised that you need to join the academy before you can verify what they are offering.  Also, you need to be a member of that academy for 1 hour before you can leave, unless you request getting kicked out, though most guilds I've seen don't accommodate such requests so I never ask.  If you do your research and ask around, you should be able to earn quite a bit here.

Mentor/Apprentice:  Just as important as the Academy rewards are the Mentor/Apprentice rewards through the Holy Promise system.  The most important thing to earn here are the 1 hour Hunter's War Rant cards.  These are extremely precious to you as you try to earn your own money.  These should be saved for when you are sure you can dedicate the time to farming.  Use these in conjunction with a high-level Endure buff from a 100+ Holy Knight if possible.  The better your survivability, the more able you are to take advantage of your drop-rate boosted time.

Cards:  Cards at this early stage in the game are truly a luxury item.  Valuable cards should be sold, not used, unless you have many multiples of cards that give you a title and stat boost.  Personally, I stuck with the Quest Expert title which gives a 1.3% increase to HP/SP and +10 to both Physical and Magical Defense.  The Slime S and King Crab A cards I received, I sold for 5g and 10g, respectively.  I also sold various other cards like Hungry Wolf for 3-5g while some others sold at 100-300s.  Again, an easy moneymaker for the newbie.  Look around the marketplace and see what the prices at which cards are being vended for.  If you're unsure, ask in your academy.  More on cards later.

Get Geared:  I was fairly lucky in that I was able to find a +0 level 20 Bone Top in a vendor for 10g.  I only had 8g at the time, so I whispered the vendor hoping he would accept my 8g, which he did.  The level 20 blue shirt, even at +0 is a huge improvement over the white NPC armor.  Just in base form, it has nearly double the DEF and also gives a +200HP bonus.  If you can find one, do whatever it takes to get it, you will need it.  I spent nearly all the money I had on just the shirt, but I was confident that I could earn it all back and then some.  At this point, you should have somewhere in the ballpark of 220 base DEF.   If you are unable to find a Bone Top, getting a decent buff is essential.  Moral here:  You often have to spend money to make money.

Enhancement:  By now, you've accumulated tons of old dusts from killing Greenkies, Phinos and the like.  You will need to start enhancing all of your gear.  With kind of a bare-bones approach to farming, you need every extra bit of DEF you can muster out of your gear.  Everything should be at a minimum +3, while going to +5 on your essential pieces, namely shirt, shield, and weapon (I did not enhance my NPC pants because at level 20 they are T2, I did not find Bone Pants which would have been a T1 enhancement).  Hats and boots give fairly low DEF gains even at +5, so take care of the bigger pieces first.  If you need more dust for stones, you can buy stacks of dust directly from Nina in Elderine then transfer them to your stone maker through storage.  Same goes for Lix[1].  If you find yourself out of Lix[1] and out of dusts, you can opt to just purchase the Elrue[1] from Kenton in Elderine of Pey in Roumen.  They sell them for 2.700s for a stack of 10.  If you've got a bunch of extra LQ Copper Ore and don't mind vending stones, you can also just buy the Elrue[1] and craft them into Lix[1] and sell them at a decent profit.  Check the other vendors around you though and price accordingly.  With a cost of only 810c +  3 LQ Copper Ore, you can easily vend at 20-40s and make a sizable (relatively) profit.  Copper Ore, you need to farm it yourself, take a pickaxe and go, don't be lazy.


What to Farm - Preparation:  Epith's Mara in Sea of Greed was always occupied whenever I went past there, so it was off to the Marlone Clan Hideout, where I intended to go anyway.  Before setting out you should have a ton of HP/SP potions (think 200 HP/100 SP, if you can manage another 50 T2 HP, that's great).  If you're running short on materials to craft them, go ahead and buy from Nina.  You will pick up quite a bit in Marlone Clan Hideout (MCH), but not unless you have your rant active.  Enough potions should be made that you are able to continuously spam them while fighting King Marlone.  Your DEF is not that high and you will get stunned and you will have a bleed debuff almost constantly.  Altogether there are seven King Marlones waiting to be farmed.  Respawn time on each is about 5 minutes from time of death.

What to Farm - Execution:  If you have your level 25 Mystery Vault Raccoon, great, it's ideal for fast travel within the MCH going from KM to KM and avoiding the other mobs along the way.  If not, then go with the hobby and do the best you can.  Try to avoid as many battles along the way as possible as these not only cut into your 1 hour War Rant boost time, but also heavily deplete your HP/SP stones and potions.  If mobs are following you, try to pull them as far as you can, dismount and kind of "wiggle", basically just move back and forth a bit.  Many of the mobs will give up and turn around, others may run up and hit you once then leave.  Unless they hit you multiple times, don't bother fighting them.  Remember, your target here is King Marlone, not the rest of his gang.  Fight what you have to, avoid the rest of the battles as best as you can.
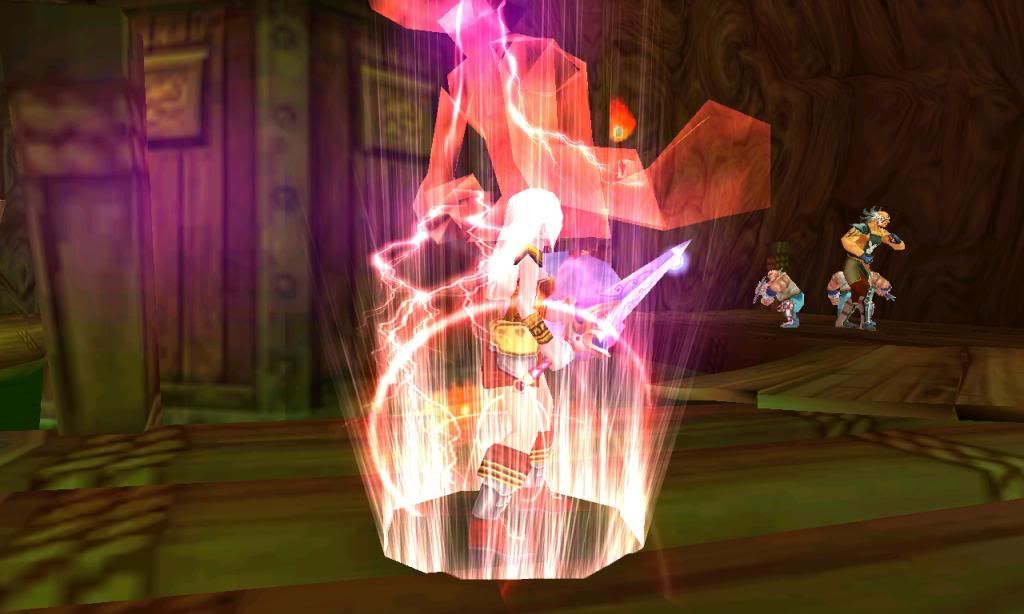

What to Farm - The Target:  King Marlone will always have 2-3 minions surrounding him.  Once you approach one of them, they will all chase after you because their aggro is initially linked together.  In these fights, you should kill them in the following order:  Marlone Archer, Marlone Fighter, Marlone Megaton, King Marlone.  The Archer has the faster attack rate and also has a bind skill that locks you in place for a few seconds, take her out first.  The Marlone Fighter has a short stun skill and does decent damage.  The Megaton is basically just a grunt, he has no special skill to watch out for.  If you are able to confidently switch targets during battle, try to save your Concussive Charge (stun) for KM himself.  He will stun you often. If you're down to just the 1 vs 1 against KM, you can use your Rest House while stunned.  This helps alleviate some of the damage by recovering your HP a bit.  Just mouse over the stun debuff icon so you'll know when to pop back out of your house and immediately go back on the attack.  Always stun when you can and try to keep Bone Slicer on him since that will slow down his attacks meaning, hopefully, less stuns of his own thrown your way.  Another reason why the Bone set is great for Fighters farming KM, the two piece effect increases Bone Slicer's duration.  Another note:  if you do not kill all of his surrounding minions, he will not respawn.  The 5 minute respawn timer begins upon the death of the last mob in his grouping, whether it is KM himself or a Megaton, Archer, or Fighter.  Be a responsible and courteous farmer, please kill all minions.


What to Farm - The Payoff:  Remember how I said cards are a luxury?  This is the biggest example of such.  The gear that KM drops is honestly, not all that valuable, but the cards can be.  The Marlone S (Marlone - King of Thieves) card can be sold for 40-60g, while the Marlone-A (Marlone) card can be sold for 20g, the final A card that he drops "Path of Sin" can be sold for about 5-15g.  The Marlone A card does grant a title and a good bonus to both damage and attack, a 2.5% increase in both and is desirable.  The S card will sell to collector's as well as the Path of Sin.  Most armors from KM can be sold from 1-10g depending on stats and class, typically fighter and mage stuff sells for more than the other 3 classes.  Rings can be valuable based on their stats, END/DEX preferred as base stat along with huge bonuses to them.  The weapons will also sell from about 300s-3g depending on stats, number of slots, and class.

Things to Keep in Mind:  While more expensive, it's better to use T1 HP pots to heal yourself rather than your HP stones.  Normally this is not the case, but because your stone capacity is so limited, use the stones when you need that bigger boost in HP recovery, use the T1 HP potions mid-battle.  Plan to carry about 4 stacks of these if possible.
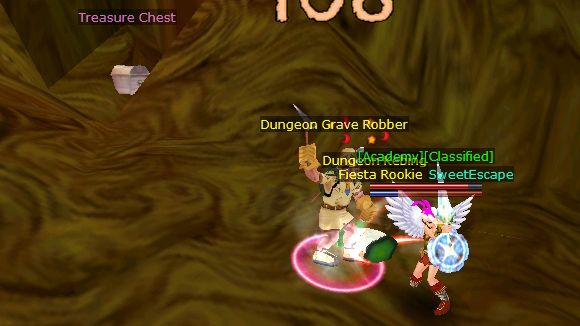
Treasure Chests abound in the Marlone Clan Hideout

Other Loot:  There are some other decent cards to get in the MCH, including Grave Robber A (Tenacity Towards Treasure), Grave Robber B (The Gold Miner), Mage Book S (The Mage Book of Doomed Spirits), Mage Book A (The Mage Book of Darkness), Mage Book B (The Mage Book of Light).  There are also Treasure Chests galore in there, the best items being the occasional pet (500s-1g).
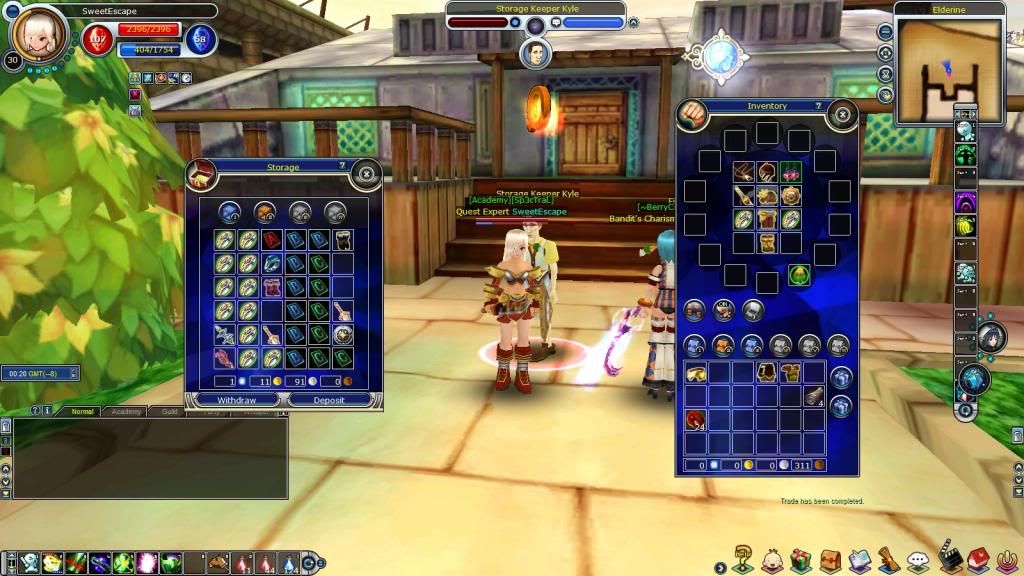

The Verdict:  All told, here's the bottom line.  One week of adventuring, averaging less than 2 hours per day, I amassed a total of 1.11 Gems, with still a ton of items remaining unsold.  My highest level character remains at level 30, the remaining are two level 1s, used strictly for productions.  The main character could be remade over and over with similar, if not better (because of the increased dungeon drop rate) results.  For someone without any SparkCash investment and new to the server, it's a great way to get your feet on solid ground financially.  The character's equipment can easily be passed along as you remake your farmer character once his/her War Rants have expired.  It's a bit of work, but there's potential there.

The Disclaimers:  Your results may vary tremendously depending on the server you choose to play on.  Epith has one of the highest populations and that helps when factoring in prices.  On a lesser populated server, items such as cards may not sell as well simply because there are less players.  It is up to you to analyze your own server's marketplace and see where you can fit in.  Epith and Bijou both suffer, surprisingly, from very few vendors selling gear of low to mid quality for the level 20-35 player.  This is a market that can be tapped into.  Not everything you sell needs to be uber godly, there is a market for players of all budgets, just price accordingly.  The lower quality items will keep your cash flow high while you can sit and wait on cashing in on the best items you've collected.

Some Other Differences - Know Your Server:  Between the hours of midnight and 3am, server time, Epith really is a ghost town around Elderine and the surrounding areas, many vendors, but few active players.  This is perfect for the well-equipped farming character, but makes finding a buff difficult for the farmer using lesser gear.


Monday, April 15, 2013

The Simplest Leveling Guide 1-59 (Part I)


Hi everyone! FatalLace here, just wanted to share with you an AWESOME leveling guide created by RikoRain.  The guide has been featured on the forums and has received tremendous positive feedback.  Since I'm often asked about stuff like this, I figured I'd reach out to RikoRain and see if I could use her guide, she agreed.  No sense rewriting the bible right?

The all-inclusive guide will be broken down into three parts covering levels 1-59, 60-89, and 90-114.  The guide has been updated numerous times to include the most recent quests and strategies for maximizing your playtime.

Just be advised that I AM NOT an advocate of powerleveling.  So if that is your answer to your leveling issues, this guide is not for you.  However, if you want to play and work at your craft, learn your class inside and out through in-game experience (not following along on the back of a Hobby Horse), then please stick around and read through these great guides.

My contribution to the guides will be some of the screenshots, artwork, and videos.  The text comes courtesy of Riko.  I may make my own notes here and there to give some extra insight.  That all being said, let's go!

Beforehand Notes:

  • KQs will be listed in detail on the first level available, and abbreviated from then on.
  • PVP KQs will be listed on the first and last levels they are available for only, with a mark to their range.
  • PVP KQs will not be listed until the first available (level 35).
  • Repeats will be listed every level, but detailed only on the first level they are available for.
  • Instances will be listed every level they are available for, if there is no instance available, it will be listed on the first level that no instance is available until one is available.
  • Instance listings will not be shown until the first instance is available (level 20).
  • Due to the quickness of these levels, they are bundled into groups of 5.
  • Hidden Mine is for all levels, so I will not bother listing it for level specifics.
  • Event specific or Temporary KQs will not be listed.
  • Daily quests (for fame) will not be listed.

Important Note: Sometimes the level ranges of Instances change. As of April 15 2013, they are accurate.


Tactic: Pick up your initial Baby quests and the "walk through" chatter beginner quests. Equip your weapon, and go kill Slimes, Mushrooms, and Imps until you hit level 6.

Notes From Fatal:  Definitely pick up the Daily Quest from Town Chief Roumenus as well.  I would suggest going with the 10% Drop Rate Increase.  Some of the early level cards, especially the Slime S Card, which gives you the Warrior of Roumen title, can be financially lucrative.


KQ: King Slime's Counter Attack (5-16) (King Slime KQ)
KQ Video:  King Slime's Counter Attack - Archer
Quest Repeats:
Working for Julia (6-10) - Collect 1 Sea Mushroom and Two Starfish
Beat Speedy Honeyings- Defeat 5 Speedy Honeyings (6-8)
My Favourite Clam 2- Obtain 3 Clam Meats (8)
Blue Crab Dish 2 (8-10) - Collect 12 Blue Crab meat
Despicable Little Ones (8-10) - Defeat 5 Little Hobs

Tactic: Pick up quests if you like. Pick up Essential Gift from Town Chief Roumenus for a free 7 day hobby horse that is faster than the basic one upon reaching the milemarker. As soon as possible, join King Slime’s and attempt to win. Otherwise, do repeat quests or pick a monster and grind.

Note: Be sure to add a higher level player as your Master at level 9 (before reaching level 10), as well as joining the active Academy of your choice also at level 9. The rewards from both of these begin as soon as the player actively levels into 10 from level 9.


KQ: King Slime
Quest Repeats:
The Mini Greenky (11-14) - Deafeat 5 Mini Greenky
Disease Carriers (12-17) - Defeat 5 Ratmen
Medicinal Herbs (12-15) - Collect 1 Herb Leaf and Defeat 15 Ratmen
Working for Karl (12-15) - Collect 10 Broken Blade
Clam Chowder (13-16) - Defeat 5 Boogy

Tactic: Use the Teleport Gate and complete The Mini Greenky and Disease Carriers over and over until 15, at which point continue to complete Disease Carriers repeatedly until 18. These two are wonderful for creating a stock of Roumen and Elderine town scrolls to help you later. 

Notes from Fatal:  In Bijou, these teleport scrolls can sell for anywhere between 100-150s a piece.  This is a pretty lucrative quest early on.  The other servers are probably pretty close.


Notes from Fatal:  Unfortunately, it's rare that the Slime Kingdom Quest fills.  If you're fortunate enough to be able to get through it with a party, great!  However, be prepared to just keep questing.


KQ: Mara Pirates' Rage (17-25) (Mara KQ)
KQ Video: Mara Pirates' Rage KQ Mage Solo
KQ Video: Mara Pirates' Rage KQ Tanking
Quest Repeats:
Clam Chowder (13-16) - Defeat 5 Boogy
Joker Kebings 2 (18-20) - Defeat 17 Joker Kebing
Speedy Boogy 2 (18-21) - Defeat 20 Speedy Boogy
Ruined Garden 2 (20-26) - Defeat 7 Prock Zone

Tactic: Continue to complete Disease carriers until you reach level 18. At 18, join Mara KQ. Each success will grant you one level until about 22. If you cannot complete KQ, simply complete the other repeats. However, avoid the Ruined Garden 2 (its experience is too low).


Notes from Fatal:  Again, like the Slime KQ, it's rare that the Mara KQ fills.  However, with a decent enough gear, a little know-how, it can be done with minimal participants.  If you're extremely well-geared, the Mara KQ can also be used to farm both the Mara and Marlone A and S cards, extremely valuable.  From here on down, please be aware that KQs may not fill, it's best to continue focusing on your quests and finishing up your levels in the Abyss.


KQ: Mara Pirates' Rage (-25) and Gold Hill Adventure (20-32) (Gold Hill KQ)
Instance: Tower of Iyzel (20-70)
Quest Repeat:
Speedy Boogy 2 (18-21) - Defeat 20 Speedy Boogy
Ruined Garden 2 (20-26) - Defeat 7 Prock Zone
Working for Raina (21-22) - Collect 5 (each) Red, Yellow, and Blue Petals
Poor Merchant (22-23) - Defeat 20 Silver Slime
Kid Woz's Small Wish (23-24) - Defeat 20 Skeleton
The Marlone Clan Megaton (23-24) - Defeat 25 Marlone Megaton
James' Request 2 (24-25) - Collect 1 Prism Powder
Herb Plant Set 2 (25-27) - Collect 5 (each) Herb Leaf, Stem, and Root
Insomnia 2 (25-27) - Defeat 15 Glow Wolf

Tactic: Complete Gold Hill KQ (and Mara if you please, but more-so Gold Hill) for quicker levels. Please remember to take a pickaxe! Each completion will grant you either a level, or a notable amount of experience. Do the above repeats between KQs for added experience boosts.


KQ: Gold Hill
KQ Video:  Gold Hill KQ - Tanking
KQ Video:  Gold Hill KQ - Cleric
Instance: Tower of Iyzel (20-70)
Quest Repeat:
Herb Plant Set 2 (25-27) - Collect 5 (each) Herb Leaf, Stem, and Root
Insomnia 2 (25-27) - Defeat 15 Glow Wolf
Frozen Ice Cream 2 (28-29) - Defeat 20 Ice Vivi
Roumen's Security Issue 2 (29-30) - Defeat 20 Cave Archmage Book
Hobby (30-31) - Collect 1 Sticky Spider Web

Tactic: Keep doing Gold Hill. You will notice you get less and less per success as you level up, but it is still good experience. Do quests in between. If you dare, you can also grind in the abyss.


KQ: Gold Hill (-33), The Millenium Robo Plot (33-45) (Robo KQ)
Instance: Tower of Iyzel (20-70)
PVP KQ: Amateur Fighter (35-49)
Quest Repeat:
Roumen's Security Issue 2 (29-30) - Defeat 20 Cave Archmage Book
Hobby (30-31) - Collect 1 Sticky Spider Web
Working for Wishis (32-33) - Defeat 30 Flying Staff
Purging The Moonlight Tomb (33-34) - Defeat 20 Bat, 15 Zombie, and 1 Zombie Master
Eyes for the Magic Staff 2 (33-35) - Defeat 25 Magic Staff
Ruby's Request 2 (34-35) - Defeat 30 Grave Wolf
The Wild and Master (35-39) - Collect 1 Wolf's Claw

Tactic: Do repeats, KQs, and quests in between to help level. At 33, Robo will offer quite a bit of experience. At 35, PVP KQ is by far one of the best ways to level up. A few Tower quests done at this time also provide a nice chunk of experience and are easy enough now that you are 10-15 levels higher.


KQ: Robo, Mean Giant Honeying (40-50)
Instance: Tower of Iyzel (20-70) and Devildom Mine (40-50)
PVP KQ: Amateur Fighter (35-49)
Quest Repeat:
The Wild and Master (35-39) - Collect 1 Wolf's Claw
The Oppression of Ghosts (37-38) - Defeat 30 Ghost
Harvest 2 (38-40) - Collect 40 Hoes
Bitter Old Myzen (39) - Defeat 30 Bone Imp
Bone Imp Bags 3 (39-40) - Collect 35 Bone Imp Bags
It Drives Me Crazy 2 (40-42) - Defeat 20 Earth Spider
For My Friend (40-50) - Defeat 1 Storm Citrie and 1 Ice Citrie (Instance repeat)

Tactic: Join Robo KQ every chance you get in an attempt to complete the KQ Questline. Also, join PVP KQ when you can. Between, complete repeats, grind in abyss/dungeons, or complete other non-repeat quests. Generally save the non-repeats for levels with no repeats, but this should not hurt you too much.


KQ: Robo (-45), Honeying (40-50)
Instance: Tower of Iyzel (20-70) and Devildom Mine (40-50)
PVP KQ: Amateur Fighter (35-49)
Quest Repeat:
It Drives Me Crazy 2 (40-42) - Defeat 20 Earth Spider
For My Friend (40-50) - Defeat 1 Storm Citrie and 1 Ice Citrie (Instance repeat)
Ugly Goblins 2 (42-43) - Defeat 50 Goblins
The Prock's Poison 2 (42-44) - Defeat 40 Prock
A Bet with Marty 2 (43) - Defeat 50 Goblin Swordsmen and Collect 20 Goblin Sword
Strange Cave of Wind 4 (43-46) - Defeat 50 Cave Archmage Books, Collect 10 Windy Cave Maps and Silver Ores: 10 LQ, 5 MQ, 1 HG
Fantastic Items (44) - Collect 22 Werebear's Claws
Best Broomsticks 3 (44-46) - Collect 50 Werebear Armpit Hair

Tactic: If you have not completed the Robo KQ Questline, now should be the time you press on to do so. Join PVP KQ as well, of course doing repeatables between KQ, and normal quests between repeatables. Should those fail, abyss, dungeons, or normal map grinding will become the default. Notable repeats are Ugly Goblins, Fantastic Items, and Best Broomsticks. 


KQ: Honeying (-50), Lost Mini Dragon and Lost Mini Dragon (Hardcore) (46-60)
Instance: Tower of Iyzel (20-70), Devildom Mine (40-50), and Devildom Barracks (50-60)
PVP KQ: Amateur Fighter (35-49)
Quest Repeat:
Best Broomsticks 3 (44-46) - Collect 50 Werebear Armpit Hair
Athlete's Foot (46-48) - Collect 10 Sand Mushroom's Heads
A Secret Request (47) - Collect 30 Goblin Captain's Helmet
Mannequin Lips (49) - Collect 10 Mini Lips' Lips
Release from Pain 2 (50-60) - Collect 20 Feather of the Foras Tribe (Instance repeat)

Tactic: Mini Dragon KQ will provide optimal experience. If you choose to join (you should), please remember to participate fully and avoid leeching at all costs. Aside from MD, complete the repeatable quests. Each one has a decent amount of experience reward, as well as a set, specific, and well-placed spawn point for the target monsters.


KQ: Mini Dragon
Instance: Tower of Iyzel (20-70) and Devildom Barracks (50-60)
PVP KQ: Brave Warrior (55-69)
Quest Repeat:
Release from Pain 2 (50-60) - Collect 20 Feather of the Foras Tribe (Instance repeat)
Grandma Myzen's Wrath (51) - Defeat 80 Weakened Ogre
The Unbreakable Chisel (52) - Collect 10 King Donkey's Tooth
Delivery Delay (53-54) - Defeat 100 Vampire Bat and 20 Lighting Vivi
Escape from Concealed Prison 2 (55) - Defeat 120 Prisoners

Tactic: Mini Dragon KQ will still provide notable amounts of experience. Repeats at every level will make saving the normal quests easy (as you should save them for 56-60). This level is all KQ and repeats.


KQ: Mini Dragon
Instance: Tower of Iyzel (20-70), Devildom Barracks (50-60), and Crystal Castle (60-69)
PVP KQ: Brave Warrior (55-69)
Quest Repeat:
The Master Criminal (57) - Defeat 50 Senior Torturers
Castle Lords's Goods 2 (60-61) - Collect 50 King Spider's Webs and 10 Queen Spider's Claws

Tactic: Since you only have 1 repeat at only 1 of these 5 levels, join PVP KQ and in between complete normal quests. At 57, do only the repeat as much as possible. For 57-60, do any and all quests while joining in PVP and Mini Dragon KQ. Usually you will reach 60 by completing all quests available - if not, you should be incredibly close. For the extra bit needed if you do not reach 60, simply spam KQs.
 

Monday, December 19, 2011

Ask Fatal - Dragon's Tomb Edition (Trickster)


Alright!  Welcome to the final installment of my Dragon's Tomb series of postings.  So far we've covered Fighters, both Tank-style as well as Damage Dealing / Sub-Tank style, Mages, Archers, and now Tricksters.  Sorry to you Cleric lovers out there, but I highly doubt I'll be doing a Cleric version as I really have no desire to level up another Cleric to 80 just for the sake of making a guide!  Let the questions begin!

What is the Trickster's primary role in the party?
This is the question that everyone asks and depending on your playstyle and gear, therein lies your answer.  The Trickster can be extremely versatile if you get a better grasp of some techniques.

Versatile?  Tricksters are squishy by nature right?  What do you expect the Trickster to do?
While it is true that a Trickster's defense and HP doesn't measure up to a Fighter's, the Trickster has the Evasion advantage.  While not the ideal "Tank" in Dragon's Tomb, the Trickster is surprisingly serviceable in this capacity.

Tanking?!  Are you nuts?
Maybe.  But to me, that's the most fun a Trickster can have in Dragon's Tomb.

Yeah, you're a bit loco... wanna explain?
Tanking for a Trickster is a bit err "tricky" in that it involves a lot of cooperation from your party.  This is where the Tanking-Trickster really needs to assert themselves.

Okay, so where to start?
As a Tanking-Trickster, you need to set a few groundrules to the party to make sure that it is successful.  The first off being that YOU set the pace.  So no Archers running up front, no Mages going off to pull, etc.  The reason for this is because you need to establish aggro quickly.

Alright, that sounds reasonable.  What else?
For some reason, Mages are more apt to cast Inferno first rather than Frost Nova.  As a Mage, I never do this, so I don't really understand why they do it, but the Mages I've partied with as a Trickster typically drop Inferno first.  This, for the Tanking-Trickster led party, is a mistake.  This technique for a Trickster takes some timing and a bit of practice.

What's so hard? I just grab a soul and cast Soul Trap right?
Hmm... not so fast.  You first need a better understanding of how Soul Trap works.  If you've ever played as Fighter, you know that the skill Devastate is directional.  Typically you only stun those mobs that are in front of you.  Any mobs behind you will be unaffected by Devastate's damage or Stun effect.  Soul Trap works much the same way.

Okay, so what does that mean for me?
This means that you need to position yourself to set up Soul Trap so that you can freeze as many mobs as possible.  This also means you damage as many mobs as possible.  More damage means more aggro generated towards you.

Establish proper positioning prior to Soul Trap.
Ahh.. that makes sense.  So what's the sequence of events that leads to a successful pull?
For the smaller, regular mobs, typically you need to pull all of the close-ranged melee-type mobs into the ranged mobs so that you can freeze/damage them all together.  If you attack only the melee-types without pulling them towards the ranged, the ranged will continue attacking you, then as the Cleric heals you, they will refocus their attacks onto the Clerics since you are no longer generating aggro.  Again, remember to position yourself in front of all the mobs, you don't want any behind you if possible.

Wow, so I need to understand some basic tanking principles?
Yes.  In order to do this successfully, you need to have a working knowledge of how to tank.  Tanking on a Trickster is much more difficult compared to tanking on a Fighter.

Yeah, I imagine so, but why?
Tanking-Fighters have many advantages over a Trickster trying to fill that role.  As stated before, higher DEF and higher HP for one, but also an abundance of aggro-grabbing skills like: Kick, Mock, Demoralizing Hit, and Slice and Dice.  The Trickster's only source of aggro are generated through damage and positioning.  Again, this is why you need a cooperative party.

So what happens when the party isn't cooperative?  What can go wrong?
Again, a Trickster is not ideal for Tanking in DT, but it can be done effectively.  A couple of the problems aside from just uncooperative party members would be Stuns and Fears.  Nothing's worse than getting stunned or feared before establishing aggro.  This is when chaos typically occurs and party members start panicking.  So again, you need to keep a level head and work on re-establishing aggro.  This doesn't mean killing!  You re-establish aggro via damage, once you established aggro on that mob, target the next one, then the next.  You may have to sacrifice your Soul Trap skill just for the sake of an Aggro grab.

Okay, so what about the party members?
If you allow the Archer or Mage to get out ahead of you, you're going to have problems establishing aggro and keeping things in order.  I always warn both Archers and Mages to be patient, wait for me to get in there first before they start AOE'ing.  This is especially problematic with Archers.  With a normal Tank, an Archer is free to move out ahead and start AOE'ing to pull mobs back to the party where the Fighter can just Mock them all to him.  This pace setting technique for Archers is detailed in my Archer-DT guide.  However, this does not work well with a non-traditional Tank.  When that Archer starts pulling, they will typically just continue kiting along avoiding damage.  This is extremely problematic for the Trickster trying to establish aggro when his targets continue running down the hall.  So again, rein in your party members and be assertive.  Not rude.  Assertive.

In the case of the Mage using Inferno, you'll see that you'll have a hard time re-establishing aggro without the help of Soul Trap's freeze effect.  It can still be done based on the strength, or in this case weakness, of the Mage, but it's more difficult.  Kindly remind your Mage to Nova first once you've pulled the mobs.

What about those panicked party members that continue just running mobs away?
Well that's really on them.  If they want to pull the mobs all the way back down the hall, then it's on them to finish them off.  If the rest of the party is safe from immediate harm, then by all means, give chase and help, but if there's danger around the main party, focus there.

Okay, I think I understand that a bit.  So what do you use to Tank?
Again, not everyone plays the same way or has the same resources.  I understand that.  This is what I use on my Trickster (Level 89 as of this write-up):
+50% HP/SP Extender
+10 BK Dual Swords (45end 33dex 6int 34spe)
+9 86 Helm (36str 35spr)
+9 85 Wonder W Armor (32end 11dex 43spr)
+9 85 Wonder W Pants (40end 41dex 30spr)
+9 85 Vanity Dance Boots (27end 41spr)
+0 40 Bloody Gem Necklace (3str 5dex 4end)
+0 85 Guardian's Wish Earring (3end 1dex +325HP +4%Evasion)
+6 40 Ring of Chaos (Totals 9str 18end 25dex 13int +42MDef)
+9 40 Ring of Chaos (Totals 7str 21end 20dex 22int 6spr +70MDef)
I always use a full compliment of T4 Scrolls (Vit, Def, MDef, Eva) as well as T1 Speed.

Geez, I can't afford that.  So what do I do with limited resources?
Much of what you can and can't do will be affected by your resources.  I've stated that in pretty much every write up.  How to play DT as a Trix fully +0?  I really wouldn't know.  That's not something I plan to, or would want to do, but I don't begrudge anyone for doing it that way.  Just understand your limitations and work from there.

If I'm fully +0, what can I do?
A fully +0 Trickster at 85 sacrifices about 700 DEF from what I use.  That's significant.  The Trickster in this case is primarily just support.  This isn't enough DEF to really be considered a Sub-Tank either.  If this scenario happens to be you, I would just focus on having Soul Trap ready when you're Tank is pulling as well as focusing your damage primarily on ranged mobs to help out your Cleric.  In the end fight vs. Cornelius, you'd get 1-hit by his AOE.  You're better off not approaching him, honestly.  You could try and help kill the spawned Shellas and Nerpas, but if you do charge in there, you run the risk of getting flattened by the Dragon.

Anything else?
Pre-85, I primarily just filled the "Sub-Tank" role.  I had an incomplete +9 75 Set (+9 pants, +7 armor, +0 boots, +0 hat, +10 Emberflame Dual Swords), but that worked fine for everything except Cornelius.  Again, if you've experienced DT on mutliple classes, you're much well equipped to figure things out and understand how every other party member will react in certain situations.

If you're an aspiring Tanking-Trickster, take it slow.  Keep going into DT with a Fighter as the primary Tank, but take a few opportunities here and there to try and increase your comfort level with Tanking.  Get out ahead a little bit and start the pull.  Work on positioning.  Understand mob positioning in relation to their status effects also (like pulling Krugers away from other idle mobs so in the event you get feared, you don't end up pulling everything).  Basically stretch your limits and improve every run.  I would also highly recommend that you keep HP pots on you at all times.  I carry T3/T4/T5 HP as well as T3 Cure potions into Dragon's Tomb.  T3 Cures are especially convenient during the fight with Cornelius as this will cure his nasty debuff.  Do keep in mind though that a Cure potion shares it's cooldown with a regular potion, timing is critical to this.

The Tanking-Trickster is NOT ideal, but it works.  If there is a Tank-Fighter available, go with that route. it's safer for the party.  But if there are none available, hopefully this helps you fill in that gap.

Below are two walk-through videos, I will be adding annotations to them a bit later.  The first video (which still needs to be uploaded) is a basic DT run with the Trickster serving as the Sub-Tank.  The second video is an example of how to run DT without the traditional tank, with the Trickster filling in.

Video I:


Video II:  Tanking - Trickster

Monday, December 12, 2011

Secrets of the Mystery Vault


In all honesty, this is a re-hash of a forum posting put together by boo_me.  I get tired of looking for some of this info, and I figure you do too, so why not re-post it here?  Anyway, here are the vault contents from start to finish:


Damaged Mystery Vault
_________________________________________________
Level Requirement: 7
Item(s) Obtained: Angel Wings (7 Day) - 5% Critical,
Lv10 Green Weapon for your class.
_________________________________________________

Chipped Mystery Vault
_________________________________________________
Level Requirement: 12
Item(s) Obtained: Bunny Ears (1 Day) - 5% Critical.
Tear of Legel (10 Units)
Lv15 Green Weapon for your class
_________________________________________________

Inferior Mystery Vault
_________________________________________________
Level Requirement: 17
Item(s) Obtained: Mini Phino (1 day) - All Stats +2
Lv20 Green Weapon for your class
_________________________________________________

Ordinary Mystery Vault
_________________________________________________
Level Requirement: 21
Item(s) Obtained: Cat Ears (1 Day) - 3% Critical
Sakura Costume (1 Day) - 5% Critical
Butterfly Wings (7 Day) - 5% Critical
_________________________________________________

Polished Mystery Vault
_________________________________________________
Level Requirement: 25
Item(s) Obtained: Raccoon Mount (7 Days)
Level 30 Stated Weapon
_________________________________________________

Flawless Mystery Vault
_________________________________________________
Level Requirement: 31
Item(s) Obtained: Red Elderine Uniform Suit (1 Days) - 7% Critical.
Corrupt Angel Wings (1 Days) - 5% Critical.
_________________________________________________

Perfect Mystery Vault
_________________________________________________
Level Requirement: 38
Item(s) Obtained: Yellow Dragon Wings (7 Days) - 5% Critical
Lv40 Weapon for your class
_________________________________________________

Pure Mystery Vault
_________________________________________________
Level Requirement: 46
Item(s) Obtained: Shark House (7 Days)
Lv50 Weapon For Your Class
_________________________________________________

Absolute Mystery Vault
_________________________________________________
Level Requirement: 56
Item(s) Obtained: 50% Health Points Extender (7 Days)
50% Mana Points Extender (7 Days)
Lv60 Weapon For Your Class
_________________________________________________

Blessed Mystery Vault
_________________________________________________
Level Requirement: 66
Item(s) Obtained: Blessing of Teva (7 Days)
100% Exp Boost (7 Days)
_________________________________________________

Enchanted Mystery Vault
_________________________________________________
Level Requirement: 76
Item(s) Obtained: 20% Charms of Strength (10 Units)
20% Charms of Defense (10 Units)
_________________________________________________

Brilliant Mystery Vault
_________________________________________________
Level Requirement: 86
Item(s) Obtained: 20% Charm of Might (10 Units)
50% War Rant (7 Days)
100% King's Touch (7 Days)
_________________________________________________

Colossal Mystery Vault
_________________________________________________
Level Requirement: 96
Item(s) Obtained: Blessing of Teva (1day)
100% Exp Boost (1 day)
Puppy Ears (7 days) - 3% Critical.
_________________________________________________

Ultimate Mystery Vault
_________________________________________________
Level Requirement: 106
Item(s) Obtained: Tears of Legel (10 Units)
20% Charm of Strength (10 Units)
20% Charm of Defense (10 Units)
20% Charm of Might (10 Units)
_________________________________________________

Wednesday, October 12, 2011

Making the Most of Your Time Whilst Doing Boring Tasks - Gathering


Hey, welcome to a quick little tips & tricks post that hopefully will save you some time or help you make a little bit of extra money.

As we all know gathering is one of the most boring things that we as players are tasked to do while working on our productions.  Personally, I'd rather just set up a shop and buy, buy, buy, but sometimes I'm left with no choice but to hike up my skirt and get to digging.


With the somewhat recent change to gathering that rewards a double drop when you successfully click that yellow gather line, it's become much more important to be able to hit that line consistently.  With this quick, pretty brainless tutorial, I'll show you how to up your success rate tremendously.

If you can hit the line with fairly good consistency, more than half the time, this will be a godsend to you.  If you struggle and only hit the line occasionally, maybe 10-25% of the time, hopefully this will give you more practice and you can get a little bit better at it.

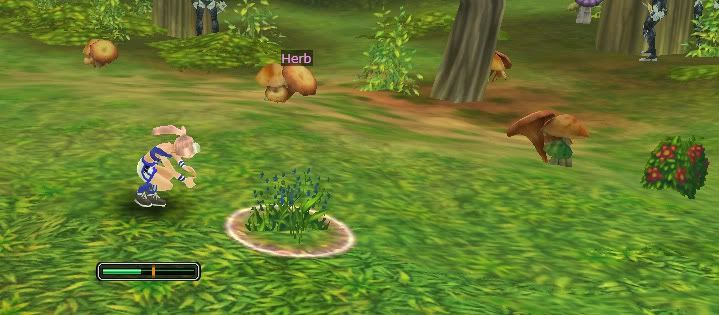
Depending on the placement of the line, you typically have 6 or 7 cracks at it to hit it per gather.  For me, the further out to the edge the line appears, the easier it is for me to hit.  Other people have more luck with the line in the middle, it just varies player to player.  You need to remember that you CANNOT spam click to hit the line, there is an invisible cooldown period with each click.  As with anything, the more you practice, the more efficient you will become.


Okay, so what's the trick to increasing your efficiency to the limits shown above?  Simple.  "Cancelling".  What I do is I attempt my timed picks up to the 5th pass of the moving bar.  If I'm unable to hit it by then, I simply move away from the gatherable item so that it resets.  Then I try again.  Having the opportunity to double your drops is worth taking the extra time to Cancel, typically.  If you're there for several minutes on the same item, then yeah, maybe this isn't a good idea for you to try unless you've got patience by the boatload.  Without Cancelling, I can still hit at about a 60% rate so using this technique doesn't slow me down at all, it increases my gathering tremendously.

If you're in a high-traffic picking area like the Nox area in Uruga, or farming chests after a GM run event, this tactic is probably not best to attempt as you'll run out of resources quickly if you don't pick quickly.  However, if you have a farming spot all to yourself, you can take the time and get it right.  The Nox spot in Uruga is particularly efficient when you're alone.  If you pick all of the items on your first run through (perfectly timed or not), you're stuck waiting for the spawns to reappear.  If you take the time to do a couple of perfectly timed picks, the spawns will probably start to overlap.  Keep in mind that you've also just doubled what you would have otherwise gathered!

Here is a short video about the technique.  You can either move away from the gatherable or hit ESC to cancel the targeting on it, either variation works fine.


Saturday, September 3, 2011

Gifting - Sometimes Just Too Good to be True


Gifting has always been a touchy subject amongst the playerbase, with gifters and giftees testing their luck against the Terms of Service (TOS).

Me, personally, I don't use gifters.  Although my real-life checkbook wishes I would, I just can't, and won't do it.  We're all well aware that gifting-for-gold is a violation of the TOS, but yet it happens daily.  I'd be willing to bet that a small number, maybe 15% of the SparkCash buying playerbase funds 80% of the level 100+ players.  As sad, and maybe appalling, as that number sounds, it's with good reason.

Fiesta is a free-to-play game, but it's also a pay-to-win game too.  The higher you progress, the more you have to spend to keep up with everyone else, it's a sad truth.  In order to make money, you have to spend money, whether that be in-game gold or real life dollars, that's reality.

Knowing this, and the competitive and materialistic side to all of us, scammers will constantly prey on our wants and needs by offering to sell us giftable items from the cash shop for in-game funds.  Since such dealings are a violation of the TOS, there is no clean way for the transaction to occur.  Either the gifter gifts first and risks getting scammed out of his SparkCash, or the buyer pays first and risks getting scammed out of his gold.  Both transactions are perilous.

These leads to another problem:  Charge Backs.  Working in retail, I have a pretty good knowledge of how charge backs work.  Basically a consumer receives their statement in the mail and sees a transaction that they believe is in error so they call the credit card company and dispute the charge.  The credit card company will immediately side with the consumer and place the charge back on the vendor.  It is then up to the vendor to furnish all proof that the transaction was legitimate.  However, when working with online transactions, the problem is far worse and the burden of proof is far more difficult to build.  Paypal works much the same way, they will side with the consumer.

As you can see from above, the system is great when it's not being used fraudulently.  It is these abusers that lead to so much unnecessary grief on other players and extra work for the OutSpark team.  At this point, I don't know if OS even fights the charge backs or they just eat them and place bans on the accounts.

What I would like to know is if OS acts when they see a pattern of behavior across a certain account or IP address and if they then take action.

As far as I know, OutSpark's method of dealing with charge backs is to ban all accounts that accessed that SparkCash.  The gifting account will receive a ban, as will all other accounts that received gifts.  Because OutSpark will not receive the money from the sale of that SparkCash because of the charge back, their methods are understandable and justified.  OutSpark will release the ban on your account if either the amount of SparkCash charged back is paid back in full or the non-used items are returned/deleted.

So as you can see, and as many players have worried, the system, as-is, can be used to further grief players by sending gifts to anyone and then placing a charge back on the transaction.  Since we no longer receive email confirmation of receiving a gift and finding out who gifted us, this can be particularly problematic.  We also do not have the ability to reject gifts.  So what should you do to protect yourself?

Question everything.  If you see something odd in your premium inventory that you know for certain you didn't pay for, do not activate the item, instead send in a ticket.  The CSR team should be able to tell you who the gift was from.  If that person is unknown to you, you can also ask the CSR team to delete the item from your inventory safeguarding your account.  If you've already activated the item and moved it from the premium inventory into your regular inventory, you put yourself at risk.

The safety and security of your account is your responsibility.  By opening yourself up to gifters and violating the TOS, you become extremely vulnerable.  Scammers are well aware that you can't open a ticket complaining that you got scammed in a gift-for-gold transaction since that in itself is illegal.  Be aware.

Wednesday, July 27, 2011

Kingdom Quest Clericing - KKP, What Not To Do


Just wanted to share this since it was as humorous as it was educational.  Anyway, I did a KKP run earlier today....

For a slight change of pace this is the "Anti"-tutorial. All you prospective Clerics out there, pay attention, this is what NOT to do.

While it could have been worse, well actually aside from pulling Phinoflie, no, it really couldn't have been worse.

Basically this is a video of me party-less in KKP tanking the end-boss without the aid of any Heals or not even a Restore. The four Clerics who (ahem) "participated" only focused on their party, didn't bother checking aggro on the boss to see who was taking the damage.

While I didn't tank the whole thing, I did about 70% or so I'd estimate, that's still no excuse at all for them. I didn't realize that other Fighter was battling me for aggro, he actually took it from me on a couple of occasions... grr... but alas, you-know-who ended up with it in the end!  (grins from ear to ear)  GenGoGu will be one to watch for while he remains KKP eligible... I smell another Aggro Battle on the horizon!

Of course I could have asked for a party, actually I had a party in the beginning. I was partied with 1 Cleric, then he dug out to join another party. I just kept my mouth shut and remained solo, figuring this would make for an interesting video if none of the Clerics paid any attention to me... So with that in the back of my head, I fired up FRAPS and this was the result!

Nothing special on my end, build-wise 3:4 DEX:END, +9 66 hat, +9 70 shirt, +9 68 pants, +6 55 boots, +9 Casha Shield, +10 70 Green Sword.

Sparkcash items: USA Soccer Uniform +5% Crit, +3% Dmg., DJ Headphones +2% Evasion, Mini-Rudolph Pet +2 All Stats.

Not married, no guild-buff.

T3 Scrolls (Vit, Def, M.Def, Eva).

Accidentally used 2 Candy Canes (100% HP/SP Potion).


The video, with music, is best viewed from my YouTube page:  http://youtube.com/fatallace


Monday, July 18, 2011

Ask Fatal - Dragon's Tomb Edition (Archer)


Finally, the wait is over, the Archer installment of this guide is complete!  It took me THAT long to get a party!  Haha just kidding, but you Archers out there can feel my pain.  (Screenshots to come, ran out of time today)

First off, I wanted to thank angel61636 for helping me start a party and sticking by me when the party started falling apart.  She could have left for other parties that required a Tank, but she stayed by me.  I never revealed to her who I was, so that makes what she did for me even more heartfelt.  Thanks again.

So let's get started!  First question!

Q: Fatal, why should I party an Archer when just about any other class would make a better choice?
A: This really depends on the make up of your current team.  An Archer can never take the place of an elite Mage, no matter what, but as a secondary Damage Dealer, an Archer can be an excellent choice.

Q: I'm still not convinced, why not use another Mage?
A: This is where it gets a bit tricky and subjective.  A superior/elite Archer can really set the pace in Dragon's Tomb.  An Archer of lesser skill should not.  The Archer needs to know what to pull, how many to pull, and understand aggro in relation to the backline.  While the Tank is pefectly fine as a pace-setter (see my DT: Tank guide), if the Archer is of high enough skill, the overall pace of a complete Dragon's Tomb run will be faster.

Q: Okay, so what should an Archer do to set the pace?
A: Just because an Archer is primarily a backline player doesn't excuse them from scrolling up and doing work.  In my case, this includes the use of speed scrolls.  If the Archer is intent on setting the pace, she needs to go out ahead of the party and start luring back to the main party via kiting.  However, the Archer needs to get a feel of what the Tank and the rest of the party is capable of handling.  For me, I take the first half of the first DT run to kind of sit back and evaluate the rest of my party.  I see how the Tank pulls, what the Tank misses aggro on (oftentimes the ranged mobs), and to get an idea of how active the Mage is.  Keeping an eye on the Cleric's positioning is also important.

Q: Once you have that, you're good to go?
A: For me yeah, I'm extremely comfortable giving myself an honest assessment of my skill and limits.  Having now observed the rest of the party I can start getting more aggressive.  After dispatching the second "boots" miniboss (Magmaton/BigMudMan), I take off for the next area ahead of my party, immediately start luring the Gargoyles, Flame Spirits along the way and then grabbing the Krugers and Caravans in the next area heading towards the "pants" minibosses.

Q: Hmm, okay I get it, you kite them then what?
A: I'll pull them all back to the party as they make their way to the "pants" path.  I immediately pull into the Fighter.  You have to be careful here though, oftentimes a single Mock isn't enough for the Fighter to establish aggro control over your mobs since you've build up a lot through kiting.  Once the Mage drops AOEs, you need to, just like a Mage does, start running tight circles around that AOE area.

Q: Wait, I'm used to straight-line kiting, I need to run circles like a Mage?
A: Yes.

Q: And the reasoning for this is?
A: You need to optimize damage and aggro recovery for your party.  Pulling your kited mobs down the hall does nobody any good.  You're pulling away from the party, the Fighter has to chase and is unable to effectively regain aggro, especially if you're booking it away from him on a speed scroll.  Running tight circles allows you, along with the Mage, to inflict as much damage on to those mobs as possible.  It also increases the Fighter's chance of regaining aggro and landing an effective Devastate to stun all those mobs.

Q: Hmm interesting. So what about ranged mobs?
A: Ranged mobs are a bit tricky.  Again, this goes back to your Tank.  If your Tank doesn't properly establish aggro on the ranged mobs, it's up to you, the Archer to do so before the Cleric starts getting hammered.  Ideally, you establish aggro early and pull those ranged mobs back into the pile of melee mobs that the Fighter is controlling.  The Fighter can attempt to establish aggro on the ranged mobs, but is more likely to just stun them with Devastate.  By then the Mage AOEs will have probably wiped them out.  Just like a Mage, an Archer is excellent at outrunning Nerpa's Slow Arrows when a speed scroll is active.


Q: Any other thoughts on setting the pace?
A: Yes.  While we, as Archers, can be extremely helpful at setting a fast pace through Dragon's Tomb, you may run into players that just don't see it that way.  The Tank, or oftentimes the Cleric, may tell you to slow it down or just, "cut it out you freakin' noob!", but don't get discouraged.  Again, this goes back to a little bit of ignorance as far as what an Archer can actually do for a party in DT.  I would relent, have the Tank set the pace and you can work within those boundaries.  It makes your life a lot easier honestly.  Players often fear the unknown, they fear change, so something like an aggressive, capable Archer throws them out of their comfort zone, but understandably so.  As your party gets more familiar, keep pushing the boundary that your party has set, but not so much that you get kicked out! 

Q: What are some other roles or tasks an Archer should be used for?
A: Archers are great at pulling the mobs that inhabit a miniboss room also.  With the targeting reticle for their AOEs, it's easy to safely pull those suckers out without activating the miniboss.  Once pulled, just simply lure those mobs into the path of the Tank so he can Mock and the party can finish them off.

Q: Okay, so Cornelius... now what?
A:  As far as positioning goes, the Archer should have the same thought process as the Mage.  Do not stand next to the Cleric.  Stand off to the side, within healing distance of the Cleric, but not so close that Corny's charge attack wipes you both out.  Archers, and Mages, should ALWAYS immediately target the summoned mobs once they appear.  Let the Tank continue to pound away at Cornelius while you take out the Shellas and Nerpas.  If you have aggro on all of the Shellas, go ahead and kite them away or preferably run them back into Cornelius where the Mage can drop an AOE on them.

Q: Help! My Tank got feared and I have aggro! I'm outta here!
A: NO NO NO! Just like the Mage, running for the exit is NOT an option.  You need to do one of several things depending on the situation.  If the Tank is dead, then you need to kite Corny away from the Cleric and the dead Tank so that the Cleric can revive the Tank.  Once the Tank is back up and ready, head back to the Tank, allow him to Mock and Kick him then cast a Nature's Protection to aid him in re-establishment of aggro.  If the Tank was simply Feared and you ended up with aggro, head back to the Fighter, stay within Kicking/Mock range and slow down your attacks.  You don't want to completely stop as Cornelius may target the Cleric, but you want to slow down your attacks enough so that the Fighter isn't struggling battling you for aggro either.

It is difficult for an Archer to pull sufficient aggro once Cornelius has targeted the party's Cleric.  The Cleric is typically in panic-mode, spamming all manner of healing skills amplifying their aggro.  Your damage simply can't keep up with that, best thing to do is just keep at it and hope the Tank recovers in time.

Q: That gives me a better idea of what to expect out of an Archer for DT, thanks!  Any last pearls of wisdom?
A: You're welcome, and yes.  As with any class or role you play, you need to take a serious, honest look at how well you handle your responsibilites in any given situation.  While it's easy for us to think we're of an elite skill level, sometimes we just aren't.  The sooner you come to grips with that, the better off you'll be.  When you lower your pride, the learning process begins.  Your eyes will open and you'll start to observe things more clearly.  Other people are counting on you to handle your role effectively in instance dungeons, when you can't the whole party suffers.  In the case of Archers, we already have a tough time finding a party, when others experience an unskilled Archer just breezing through DT on other people's hard work, that really puts a sour taste in their mouth and they won't give another Archer a chance, but the opposite is also true.  Be the example, not the excuse.

One last thought:  As you guys know, I've taken every class now, including Tricksters (guide forthcoming) through Dragon's Tomb, so I've seen all sides.  This gives me the best perspective on how to do things the right way here.  If you're a first-time DT'er, take it slow.  Reading through my guides can help you, but they don't replace actually experiencing the dungeon first-hand.

Sunday, July 10, 2011

Project: Tank - The Crystal Castle


It's somewhat hard to write a complete guide for the Crystal Castle because the layout varies each time you enter, but there are a few key things to look for as you enter each room.  I'll break down some of the harder ones and give you some tips on how to wipe them clean.  You can also view the video here:


Compliments are always a nice thing!  =)
We're not always perfect, but we come pretty close.
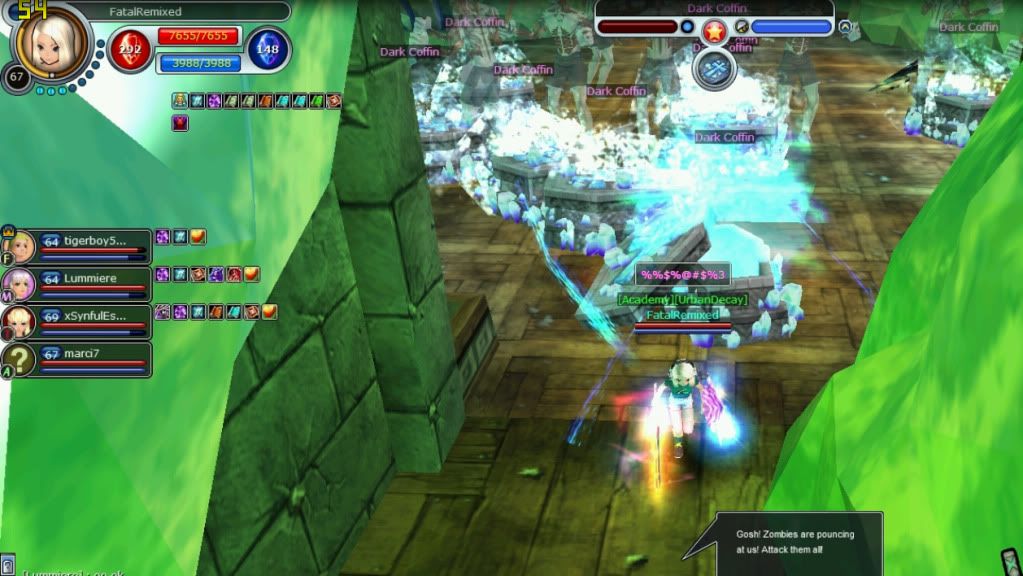
Zombies -
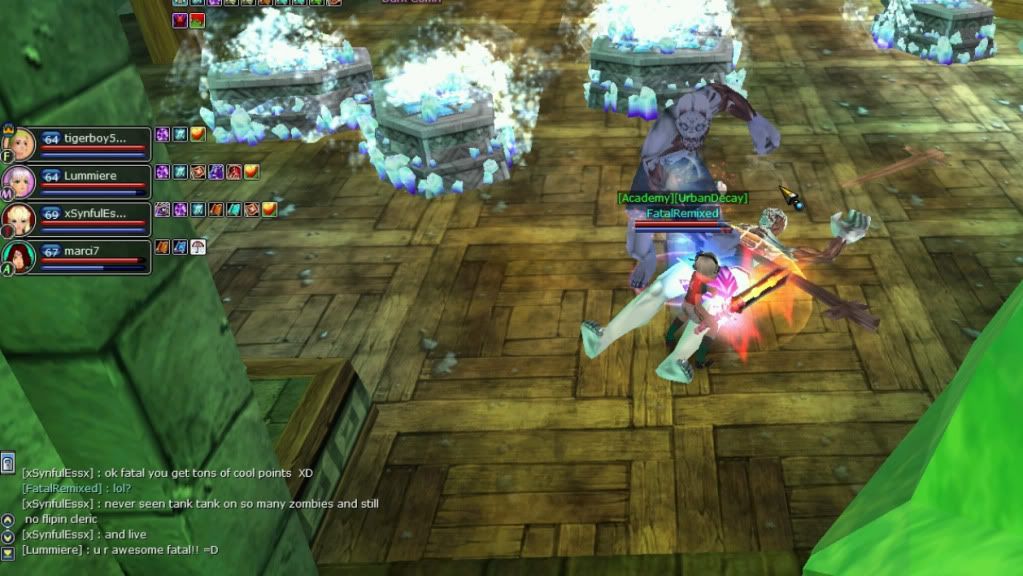
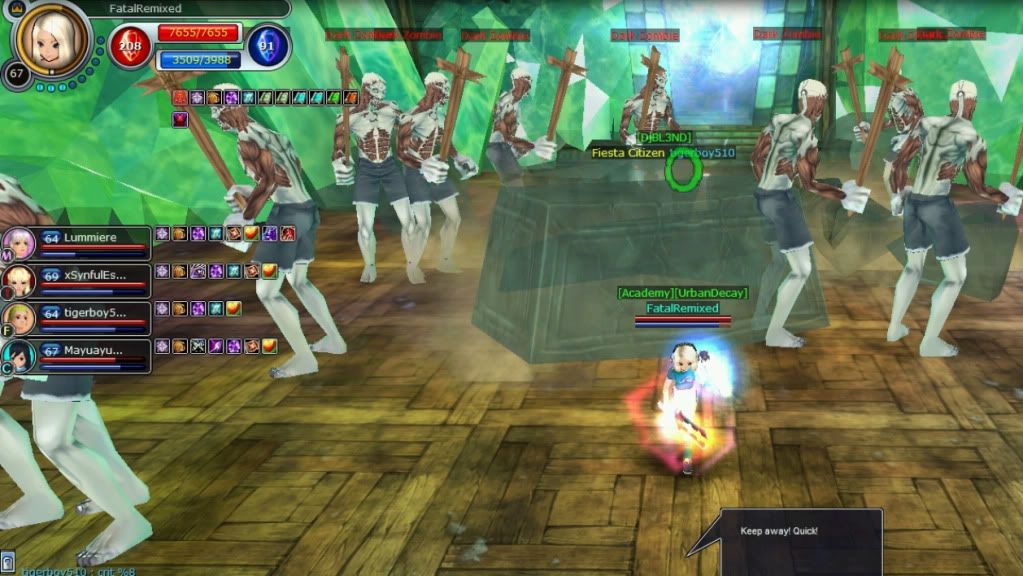
Zombies emerge from several different triggers.  Coffins, Kamaris, Chests, and Ores.  They have a quick attack as well as a high damage AOE.  I'm not 100% sure whether that AOE is M.dmg based or not, but it hurts.  A lot.  So how I tackle Zombies is usually 3-5 at a time, even without a Cleric.  This is not a case where you want to stick your chest out and pull the whole room.  If you do so and get caught by 3 or 4 simultaneous AOEs, you're done and chances are so is your party.  Zombies don't have much HP/DEF so they go down pretty quickly, especially if you have multiple 67+ Mages in your party.  It's just a matter of you, the Tank, taking that pounding and keeping aggro.  You can do Zombies without a Cleric if you're comfortable judging your ideal stone/potion usage.

Kinda my fault for not asking him to stay back....
The other Fighter actually ran towards the Zombies when the Kamaris died.
You can see him buried in here, pulling them all.  >. < !!!
I Mocked, but wasn't able to handle that many at once.
Kamaris -
Kamaris themselves aren't much to handle, but after they die, they spawn a roomful of either Zombies, Trees, or Magic Staffs (the three drop repeats).  A word to the wise, keep other players out of that room including other Fighters.  While they can help kill the Kamaris faster, the chances that they will pull too many mobs once the Kamaris dies, is extremely high.  If the mobs happen to be Zombies, more than likely it'll end up in the party getting wiped out.  (Viewable at 5:25 of the video)

Vampire Bats -
Vampire bats are similar to Zombies, but they only show up mixed with those other fat, Piggy Bat looking guys.  Usually the fat bats have a magic "immunity" (their word, not mine) that increases their m.def tremendously.  The Vampire Bats also have a high dmg AOE so be careful where you're pulling.  Typically you want to pull stuff like this into one of the far corners awayf rom the party, with enough sightlines that you can still see them should a Bat wander off towards them; you'll be able to Kick it back to you.  Don't pull these back to the party or into the near corners if possible.  The near corners are to always be avoided because the Cleric will be unable to heal you without running into the room.  That puts the Cleric at risk as she's running, she may take a smack of that nasty AOE.

Orcs -
Orcs, like the rest mentioned above have a deadly AOE.  Just be mindful of your pulls and aggro control and you'll be alright.  No reason to panic.


Archers / Skelelton Archers / Pinkies -
Ranged mobs can cause some distress if not handled properly.  Ideally, the Tank should rush the room, pulling all the mobs back into the entryway creating a chokepoint.  At that chokepoint, you should do your aggro grabs (Mock + Demoralizing Hit) and hit Devastate.  This will disable most of the mobs you've pulled making it much easier to take them out as a collective group.  If everyone charges the room, it gets extremely chaotic as you run from mob to mob while keeping an eye on non-aggroed mobs attacking the backline.  Establish control of your party and let them know your plan ahead of time.

Boss Fights -
The Boss battles are actually pretty straight-forward.  There are three different bosses:  Jewel Golem, a Guardian Lizardman, and a Guardian Great Orc.  Of the three, the Jewel Golem is the worst and always the longest battle.  All three bosses should be pulled out of the top room and down to the bottom entry room.  This way, you avoid the waves of summoned mobs from the boss.  All summons appear in that top room, so unless you want a challenge, just pull them down. 

For the Lizardman and Great Orc, you'll notice that they have a buff when you first encounter them, there are three ways of eliminating that buff:  Purge from a Mage, destroying the light pillars in the top room, or simply waiting it out.  Purge does not have a 100% success rate vs. Bosses, so it may take the Mage several attempts before he can delete that buff.  Having him Chain Cast + Purge is a good idea.  Killing the Light Pillars isn't very hard, you just have to deal with the mobs that are in there if you didn't pull all of them at the beginning.  Waiting it out really doesn't make much sense but you can do it if you choose.  Not sure how long that buff lasts, maybe 10 minutes?


For Jewel Golem, you'll see that he has two buffs.  The first one looks like the "idle state" icon you see when you log in or change maps.  For him it's an "Unattackable Status".  What this means is he cannot be hurt by anything.  The Tank will need to maintain aggro on the Jewel Golem while the rest of the party takes out the four Light Pillars.  While the rest of the party is in the top room, there's really not much for you to do.  I would recommend spamming your debuffs as they will help ease the damage you take (Demoralizing Hit, Immobilize, and Bone Slicer).  If you choose not to spam skills for some reason, your auto-attack should be sufficient to maintain aggro over your Cleric.  If you're unsure, toss a few Kicks in here and there.  Once those Pillars come down, the party should join you on the bottom and wipe the floor clean with Jewel Golem.

All three bosses have a pretty heavy AOE attack, so if you have some weaker members it might be better serrved to just have them sit back and wait it out instead of dying, minimizing your party buff, and altering your Cleric's focus.

Friday, July 1, 2011

Project: Tanker - Spider KQ


Hi guys!  Welcome to the next installment in the Project: Tank series.  Today's video details the Spider Kingdom Quest!


Now as you all know, Spider can be a bit tricky, there is usually a division between the people that want to kill the Great Spider at the end, and those who would rather just kite it to ensure a win for all.  Me?  Of course I always want to kill it.  Personally, I don't think either Spider or Robo should be able to be kited to the end of the timer, just seems cheap.  I think they should either eliminate the whole "Kiting-to-Victory" or have a greater reward for killing the end bosses, but that's a story for a different day.

Okay, so entering this KQ, as the Tank, typically you'll want to party a Cleric as soon as possible, especially if your intentions are to kill the Great Spider.  Unfortunately, this didn't work out for me in the video.  There was only one Cleric, ThatGuyWhoHeals.  He was scooped up into a party while I just kinda ran solo a bit, I later partied some other people.  We were unsure if we would attempt a kill on GS, but we decided to give it a try.  Thankfully, we had a bunch of Mages and Archers so that made the end a lot easier.

ThatGuyWhoHeals did a great job of keeping his party alive, but also turning his focus to me, the main Tank, despite not being in his party.  This is extremely important for Clerics, as much as possible, pay attention to everything going on.  If you see your party isn't taking any damage, click on the mob with the highest threat level and see who he is attacking, good chance it's the Tank, focus healing the Tank until your party start to take damage. once your party is safe, find the Tank again.  I thanked ThatGuyWhoHeals during the KQ and again afterwards.

Another thing I don't like about Spider KQ is that you can't really set the pace as the Tank.  The mobs are summoned around you and you really have no control over that.  If you're trying to tank all of the spawns, then oftentimes you're scrambling, if you can manage to do this, great, if not, focus on the biggest threats, like the Madness Grave Robbers or Ultra Spiders and maintain aggro on them via Kick, Mock, Demoralizing Hit, and Slice and Dice.  Target switch if necessary.  When Vivis and Magebooks appear, run by with a Mock or Demo to establish a bit of aggro.  If the mobs already targeted other players, you'll probably have to use Mock or Kick.

The final battle with Great Spider can be tricky, especially if you lag when the Minis are summoned.  As you can see in the video they come in waves by the dozens.  Since I didn't have a dedicated Cleric, I didn't spam Mock, but I did spam Demoralizing Hit.  While Demoralizing Hit doesn't have the aggro draw that Mock does, it does have a -DMG debuff associated with it.  If you choose to let some of the spawns go, it's best that they have that debuff, it will lower the chances of them killing off the other players that they will eventually target.  I did Mock when I could, but I didn't want to keep aggro of everything on me because I didn't know what kind of situation ThatGuyWhoHeals would find himself in.  I couldn't monitor his health, so I didn't know what kind of danger he was in and if he would just take off and run and leave me stranded, so I Mocked when I could.  If you watch the video though, you'll notice my party taking loads of damage at the end.  Looking back, and after another round, I found that I could safely maintain aggro on GS as well as more of the Minis even without a Cleric around.

Okay, so GS is dead now what?  Why are all the spawns still around!!?  Well it's about 30 seconds of mayhem after Great Spider is dead.  During this time, try and round up as many of the strays as possible, continue helping out the rest of the KQ participants, use Mock, use Kick, use Demoralizing Hit, but keep yourself safe also.


This was kinda fun... in a KQ I entered last night, I ran into JAZMYNE6969, the same Fighter that called me a "nub" in MiniDragon.  Prior to the final battle, Jaz and I agreed to see who could generate the most and hold aggro on Great Spider, myself being a modest Tank build, Jaz being a DD build.


Honestly, I was a bit concerned when Jaz announced he/she had over 3500 dmg compared to my measly 1245 dmg! Jaz claimed more DEF than I had even though I had a shield and Jaz was also loaded with SparkCash,... 12% Crit Swimsuit, 8% Crit Angel Helm, 5% Crit Angel Wings, 3% Crit Sunglasses, and Papillion Weapon Skin on his/her +10 Axe! All I had was a Mexico Soccer Uniform 3% Dmg, 5% Crit and DJ Headphones 2% Eva. With the odds stacked in Jaz's favor, I had to work on aggro grabs quickly.

Oh, did I forget to mention our KQ had NO CLERICS? Not a single one. So, not only did the Fighter who held aggro on Great Spider have to deal with his attacks, but also tons of spawned Minis! So how did it turn out? Watch and find out!

Related Posts with Thumbnails