Showing posts with label Instance Dungeons. Show all posts

Monday, December 19, 2011

Ask Fatal - Dragon's Tomb Edition (Trickster)


Alright!  Welcome to the final installment of my Dragon's Tomb series of postings.  So far we've covered Fighters, both Tank-style as well as Damage Dealing / Sub-Tank style, Mages, Archers, and now Tricksters.  Sorry to you Cleric lovers out there, but I highly doubt I'll be doing a Cleric version as I really have no desire to level up another Cleric to 80 just for the sake of making a guide!  Let the questions begin!

What is the Trickster's primary role in the party?
This is the question that everyone asks and depending on your playstyle and gear, therein lies your answer.  The Trickster can be extremely versatile if you get a better grasp of some techniques.

Versatile?  Tricksters are squishy by nature right?  What do you expect the Trickster to do?
While it is true that a Trickster's defense and HP doesn't measure up to a Fighter's, the Trickster has the Evasion advantage.  While not the ideal "Tank" in Dragon's Tomb, the Trickster is surprisingly serviceable in this capacity.

Tanking?!  Are you nuts?
Maybe.  But to me, that's the most fun a Trickster can have in Dragon's Tomb.

Yeah, you're a bit loco... wanna explain?
Tanking for a Trickster is a bit err "tricky" in that it involves a lot of cooperation from your party.  This is where the Tanking-Trickster really needs to assert themselves.

Okay, so where to start?
As a Tanking-Trickster, you need to set a few groundrules to the party to make sure that it is successful.  The first off being that YOU set the pace.  So no Archers running up front, no Mages going off to pull, etc.  The reason for this is because you need to establish aggro quickly.

Alright, that sounds reasonable.  What else?
For some reason, Mages are more apt to cast Inferno first rather than Frost Nova.  As a Mage, I never do this, so I don't really understand why they do it, but the Mages I've partied with as a Trickster typically drop Inferno first.  This, for the Tanking-Trickster led party, is a mistake.  This technique for a Trickster takes some timing and a bit of practice.

What's so hard? I just grab a soul and cast Soul Trap right?
Hmm... not so fast.  You first need a better understanding of how Soul Trap works.  If you've ever played as Fighter, you know that the skill Devastate is directional.  Typically you only stun those mobs that are in front of you.  Any mobs behind you will be unaffected by Devastate's damage or Stun effect.  Soul Trap works much the same way.

Okay, so what does that mean for me?
This means that you need to position yourself to set up Soul Trap so that you can freeze as many mobs as possible.  This also means you damage as many mobs as possible.  More damage means more aggro generated towards you.
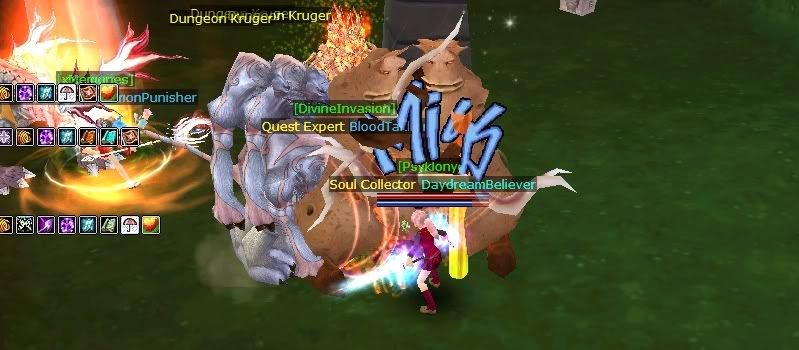
Establish proper positioning prior to Soul Trap.
Ahh.. that makes sense.  So what's the sequence of events that leads to a successful pull?
For the smaller, regular mobs, typically you need to pull all of the close-ranged melee-type mobs into the ranged mobs so that you can freeze/damage them all together.  If you attack only the melee-types without pulling them towards the ranged, the ranged will continue attacking you, then as the Cleric heals you, they will refocus their attacks onto the Clerics since you are no longer generating aggro.  Again, remember to position yourself in front of all the mobs, you don't want any behind you if possible.

Wow, so I need to understand some basic tanking principles?
Yes.  In order to do this successfully, you need to have a working knowledge of how to tank.  Tanking on a Trickster is much more difficult compared to tanking on a Fighter.

Yeah, I imagine so, but why?
Tanking-Fighters have many advantages over a Trickster trying to fill that role.  As stated before, higher DEF and higher HP for one, but also an abundance of aggro-grabbing skills like: Kick, Mock, Demoralizing Hit, and Slice and Dice.  The Trickster's only source of aggro are generated through damage and positioning.  Again, this is why you need a cooperative party.

So what happens when the party isn't cooperative?  What can go wrong?
Again, a Trickster is not ideal for Tanking in DT, but it can be done effectively.  A couple of the problems aside from just uncooperative party members would be Stuns and Fears.  Nothing's worse than getting stunned or feared before establishing aggro.  This is when chaos typically occurs and party members start panicking.  So again, you need to keep a level head and work on re-establishing aggro.  This doesn't mean killing!  You re-establish aggro via damage, once you established aggro on that mob, target the next one, then the next.  You may have to sacrifice your Soul Trap skill just for the sake of an Aggro grab.

Okay, so what about the party members?
If you allow the Archer or Mage to get out ahead of you, you're going to have problems establishing aggro and keeping things in order.  I always warn both Archers and Mages to be patient, wait for me to get in there first before they start AOE'ing.  This is especially problematic with Archers.  With a normal Tank, an Archer is free to move out ahead and start AOE'ing to pull mobs back to the party where the Fighter can just Mock them all to him.  This pace setting technique for Archers is detailed in my Archer-DT guide.  However, this does not work well with a non-traditional Tank.  When that Archer starts pulling, they will typically just continue kiting along avoiding damage.  This is extremely problematic for the Trickster trying to establish aggro when his targets continue running down the hall.  So again, rein in your party members and be assertive.  Not rude.  Assertive.

In the case of the Mage using Inferno, you'll see that you'll have a hard time re-establishing aggro without the help of Soul Trap's freeze effect.  It can still be done based on the strength, or in this case weakness, of the Mage, but it's more difficult.  Kindly remind your Mage to Nova first once you've pulled the mobs.

What about those panicked party members that continue just running mobs away?
Well that's really on them.  If they want to pull the mobs all the way back down the hall, then it's on them to finish them off.  If the rest of the party is safe from immediate harm, then by all means, give chase and help, but if there's danger around the main party, focus there.

Okay, I think I understand that a bit.  So what do you use to Tank?
Again, not everyone plays the same way or has the same resources.  I understand that.  This is what I use on my Trickster (Level 89 as of this write-up):
+50% HP/SP Extender
+10 BK Dual Swords (45end 33dex 6int 34spe)
+9 86 Helm (36str 35spr)
+9 85 Wonder W Armor (32end 11dex 43spr)
+9 85 Wonder W Pants (40end 41dex 30spr)
+9 85 Vanity Dance Boots (27end 41spr)
+0 40 Bloody Gem Necklace (3str 5dex 4end)
+0 85 Guardian's Wish Earring (3end 1dex +325HP +4%Evasion)
+6 40 Ring of Chaos (Totals 9str 18end 25dex 13int +42MDef)
+9 40 Ring of Chaos (Totals 7str 21end 20dex 22int 6spr +70MDef)
I always use a full compliment of T4 Scrolls (Vit, Def, MDef, Eva) as well as T1 Speed.

Geez, I can't afford that.  So what do I do with limited resources?
Much of what you can and can't do will be affected by your resources.  I've stated that in pretty much every write up.  How to play DT as a Trix fully +0?  I really wouldn't know.  That's not something I plan to, or would want to do, but I don't begrudge anyone for doing it that way.  Just understand your limitations and work from there.

If I'm fully +0, what can I do?
A fully +0 Trickster at 85 sacrifices about 700 DEF from what I use.  That's significant.  The Trickster in this case is primarily just support.  This isn't enough DEF to really be considered a Sub-Tank either.  If this scenario happens to be you, I would just focus on having Soul Trap ready when you're Tank is pulling as well as focusing your damage primarily on ranged mobs to help out your Cleric.  In the end fight vs. Cornelius, you'd get 1-hit by his AOE.  You're better off not approaching him, honestly.  You could try and help kill the spawned Shellas and Nerpas, but if you do charge in there, you run the risk of getting flattened by the Dragon.

Anything else?
Pre-85, I primarily just filled the "Sub-Tank" role.  I had an incomplete +9 75 Set (+9 pants, +7 armor, +0 boots, +0 hat, +10 Emberflame Dual Swords), but that worked fine for everything except Cornelius.  Again, if you've experienced DT on mutliple classes, you're much well equipped to figure things out and understand how every other party member will react in certain situations.

If you're an aspiring Tanking-Trickster, take it slow.  Keep going into DT with a Fighter as the primary Tank, but take a few opportunities here and there to try and increase your comfort level with Tanking.  Get out ahead a little bit and start the pull.  Work on positioning.  Understand mob positioning in relation to their status effects also (like pulling Krugers away from other idle mobs so in the event you get feared, you don't end up pulling everything).  Basically stretch your limits and improve every run.  I would also highly recommend that you keep HP pots on you at all times.  I carry T3/T4/T5 HP as well as T3 Cure potions into Dragon's Tomb.  T3 Cures are especially convenient during the fight with Cornelius as this will cure his nasty debuff.  Do keep in mind though that a Cure potion shares it's cooldown with a regular potion, timing is critical to this.

The Tanking-Trickster is NOT ideal, but it works.  If there is a Tank-Fighter available, go with that route. it's safer for the party.  But if there are none available, hopefully this helps you fill in that gap.

Below are two walk-through videos, I will be adding annotations to them a bit later.  The first video (which still needs to be uploaded) is a basic DT run with the Trickster serving as the Sub-Tank.  The second video is an example of how to run DT without the traditional tank, with the Trickster filling in.

Video I:


Video II:  Tanking - Trickster

Monday, August 29, 2011

A Journey Into the Secret Lab!


Who says Archers never get Lab parties?  Well, for 99% of us, that's true, even for me.  Fortunately, I ran into some friends in FBZ1 that were looking to do a few runs in Secret Lab and they asked if I'd be interested.  Since I hadn't gone to Lab on my SharpShooter in months (probably closer to a year), I pounced on the opportunity.  Sadly, my time was limited so we could only get two full runs in.  I do want to thank ChocolateThunder, WhutAboot1T, and MorePewPewLessQQ for letting me tag along.  It was perfect timing as I had wanted to do a full-run video and thought activating my Warlock would be my only hope... that or *gasp!* I go in as an HK...


Since I was only available for an hour, I didn't Cookie, I just used a 20% STR/DEF Charm, some of the freebies from Vault, I think.  It was sufficient as both Fighters managed aggro fine.  We didn't add another player and just went with that we had, 110 Gladiator, 110 Knight, 107 SharpShooter, and 106 HolyKnight.  It was the first time I've gone through Lab without a Mage in the party.  We completed two runs, didn't get any weapons (first run we cracked a tube, second run we had an empty chest), but did manage to get a Guardian Shirt and Gladiator Pants, neither of them were all that good.

All in all, I had a lot of fun, got to complete one of my quests in there, so it was definitely worth my time.  The party was strong enough that the shortcomings of the Archer subclasses weren't too much of a detriment.

As far as tips for an Archer heading into Secret Lab?  Well in the off-chance that you are actually invited, don't be a noob.
  • Stay back, play backline, let the Knights or whomever's tanking, set the pace.  
  • Stay alive as much as possible to keep the party buffs at maximum, so that means being fully scrolled.  
  • Be sure to target what the Tank is targeting unless you can handle a few hits in there.  
  • Keep your AOEs to a minimum as you don't want to be the one to mistakenly crack a Tube with a misplaced AOE  As you get more comfortable in there, you can open up a bit.
  • Click to target (or use party window, aggro window), tabbing can be dangerous as you may target the Tube
  • Be quiet. Observe. Learn.
  • Keep all of the above in consideration, but do try to have some fun in there!

Monday, July 18, 2011

Ask Fatal - Dragon's Tomb Edition (Archer)


Finally, the wait is over, the Archer installment of this guide is complete!  It took me THAT long to get a party!  Haha just kidding, but you Archers out there can feel my pain.  (Screenshots to come, ran out of time today)

First off, I wanted to thank angel61636 for helping me start a party and sticking by me when the party started falling apart.  She could have left for other parties that required a Tank, but she stayed by me.  I never revealed to her who I was, so that makes what she did for me even more heartfelt.  Thanks again.

So let's get started!  First question!

Q: Fatal, why should I party an Archer when just about any other class would make a better choice?
A: This really depends on the make up of your current team.  An Archer can never take the place of an elite Mage, no matter what, but as a secondary Damage Dealer, an Archer can be an excellent choice.

Q: I'm still not convinced, why not use another Mage?
A: This is where it gets a bit tricky and subjective.  A superior/elite Archer can really set the pace in Dragon's Tomb.  An Archer of lesser skill should not.  The Archer needs to know what to pull, how many to pull, and understand aggro in relation to the backline.  While the Tank is pefectly fine as a pace-setter (see my DT: Tank guide), if the Archer is of high enough skill, the overall pace of a complete Dragon's Tomb run will be faster.

Q: Okay, so what should an Archer do to set the pace?
A: Just because an Archer is primarily a backline player doesn't excuse them from scrolling up and doing work.  In my case, this includes the use of speed scrolls.  If the Archer is intent on setting the pace, she needs to go out ahead of the party and start luring back to the main party via kiting.  However, the Archer needs to get a feel of what the Tank and the rest of the party is capable of handling.  For me, I take the first half of the first DT run to kind of sit back and evaluate the rest of my party.  I see how the Tank pulls, what the Tank misses aggro on (oftentimes the ranged mobs), and to get an idea of how active the Mage is.  Keeping an eye on the Cleric's positioning is also important.

Q: Once you have that, you're good to go?
A: For me yeah, I'm extremely comfortable giving myself an honest assessment of my skill and limits.  Having now observed the rest of the party I can start getting more aggressive.  After dispatching the second "boots" miniboss (Magmaton/BigMudMan), I take off for the next area ahead of my party, immediately start luring the Gargoyles, Flame Spirits along the way and then grabbing the Krugers and Caravans in the next area heading towards the "pants" minibosses.

Q: Hmm, okay I get it, you kite them then what?
A: I'll pull them all back to the party as they make their way to the "pants" path.  I immediately pull into the Fighter.  You have to be careful here though, oftentimes a single Mock isn't enough for the Fighter to establish aggro control over your mobs since you've build up a lot through kiting.  Once the Mage drops AOEs, you need to, just like a Mage does, start running tight circles around that AOE area.

Q: Wait, I'm used to straight-line kiting, I need to run circles like a Mage?
A: Yes.

Q: And the reasoning for this is?
A: You need to optimize damage and aggro recovery for your party.  Pulling your kited mobs down the hall does nobody any good.  You're pulling away from the party, the Fighter has to chase and is unable to effectively regain aggro, especially if you're booking it away from him on a speed scroll.  Running tight circles allows you, along with the Mage, to inflict as much damage on to those mobs as possible.  It also increases the Fighter's chance of regaining aggro and landing an effective Devastate to stun all those mobs.

Q: Hmm interesting. So what about ranged mobs?
A: Ranged mobs are a bit tricky.  Again, this goes back to your Tank.  If your Tank doesn't properly establish aggro on the ranged mobs, it's up to you, the Archer to do so before the Cleric starts getting hammered.  Ideally, you establish aggro early and pull those ranged mobs back into the pile of melee mobs that the Fighter is controlling.  The Fighter can attempt to establish aggro on the ranged mobs, but is more likely to just stun them with Devastate.  By then the Mage AOEs will have probably wiped them out.  Just like a Mage, an Archer is excellent at outrunning Nerpa's Slow Arrows when a speed scroll is active.


Q: Any other thoughts on setting the pace?
A: Yes.  While we, as Archers, can be extremely helpful at setting a fast pace through Dragon's Tomb, you may run into players that just don't see it that way.  The Tank, or oftentimes the Cleric, may tell you to slow it down or just, "cut it out you freakin' noob!", but don't get discouraged.  Again, this goes back to a little bit of ignorance as far as what an Archer can actually do for a party in DT.  I would relent, have the Tank set the pace and you can work within those boundaries.  It makes your life a lot easier honestly.  Players often fear the unknown, they fear change, so something like an aggressive, capable Archer throws them out of their comfort zone, but understandably so.  As your party gets more familiar, keep pushing the boundary that your party has set, but not so much that you get kicked out! 

Q: What are some other roles or tasks an Archer should be used for?
A: Archers are great at pulling the mobs that inhabit a miniboss room also.  With the targeting reticle for their AOEs, it's easy to safely pull those suckers out without activating the miniboss.  Once pulled, just simply lure those mobs into the path of the Tank so he can Mock and the party can finish them off.

Q: Okay, so Cornelius... now what?
A:  As far as positioning goes, the Archer should have the same thought process as the Mage.  Do not stand next to the Cleric.  Stand off to the side, within healing distance of the Cleric, but not so close that Corny's charge attack wipes you both out.  Archers, and Mages, should ALWAYS immediately target the summoned mobs once they appear.  Let the Tank continue to pound away at Cornelius while you take out the Shellas and Nerpas.  If you have aggro on all of the Shellas, go ahead and kite them away or preferably run them back into Cornelius where the Mage can drop an AOE on them.

Q: Help! My Tank got feared and I have aggro! I'm outta here!
A: NO NO NO! Just like the Mage, running for the exit is NOT an option.  You need to do one of several things depending on the situation.  If the Tank is dead, then you need to kite Corny away from the Cleric and the dead Tank so that the Cleric can revive the Tank.  Once the Tank is back up and ready, head back to the Tank, allow him to Mock and Kick him then cast a Nature's Protection to aid him in re-establishment of aggro.  If the Tank was simply Feared and you ended up with aggro, head back to the Fighter, stay within Kicking/Mock range and slow down your attacks.  You don't want to completely stop as Cornelius may target the Cleric, but you want to slow down your attacks enough so that the Fighter isn't struggling battling you for aggro either.

It is difficult for an Archer to pull sufficient aggro once Cornelius has targeted the party's Cleric.  The Cleric is typically in panic-mode, spamming all manner of healing skills amplifying their aggro.  Your damage simply can't keep up with that, best thing to do is just keep at it and hope the Tank recovers in time.

Q: That gives me a better idea of what to expect out of an Archer for DT, thanks!  Any last pearls of wisdom?
A: You're welcome, and yes.  As with any class or role you play, you need to take a serious, honest look at how well you handle your responsibilites in any given situation.  While it's easy for us to think we're of an elite skill level, sometimes we just aren't.  The sooner you come to grips with that, the better off you'll be.  When you lower your pride, the learning process begins.  Your eyes will open and you'll start to observe things more clearly.  Other people are counting on you to handle your role effectively in instance dungeons, when you can't the whole party suffers.  In the case of Archers, we already have a tough time finding a party, when others experience an unskilled Archer just breezing through DT on other people's hard work, that really puts a sour taste in their mouth and they won't give another Archer a chance, but the opposite is also true.  Be the example, not the excuse.

One last thought:  As you guys know, I've taken every class now, including Tricksters (guide forthcoming) through Dragon's Tomb, so I've seen all sides.  This gives me the best perspective on how to do things the right way here.  If you're a first-time DT'er, take it slow.  Reading through my guides can help you, but they don't replace actually experiencing the dungeon first-hand.

Sunday, July 10, 2011

Project: Tank - The Crystal Castle


It's somewhat hard to write a complete guide for the Crystal Castle because the layout varies each time you enter, but there are a few key things to look for as you enter each room.  I'll break down some of the harder ones and give you some tips on how to wipe them clean.  You can also view the video here:


Compliments are always a nice thing!  =)
We're not always perfect, but we come pretty close.
Zombies -
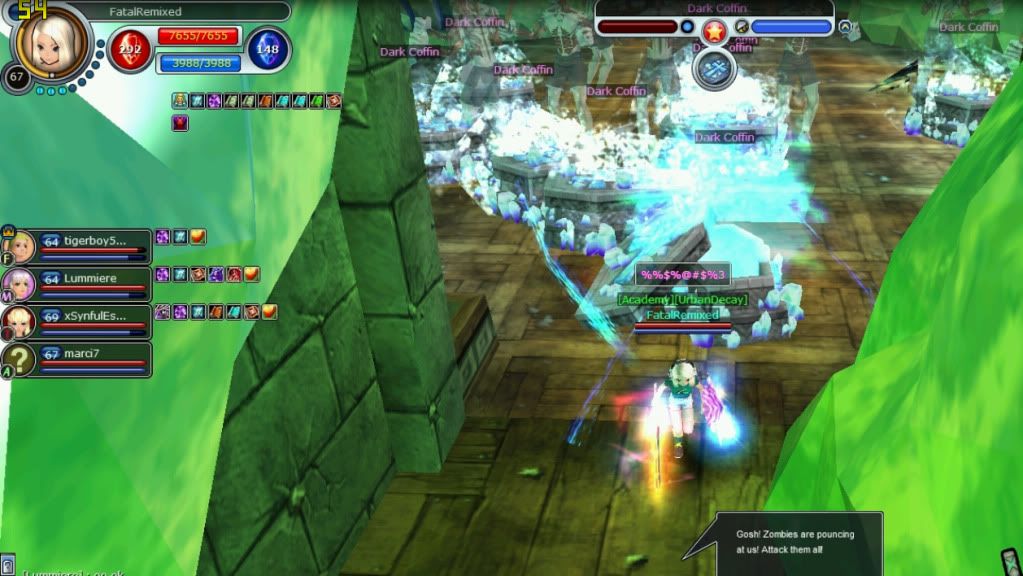
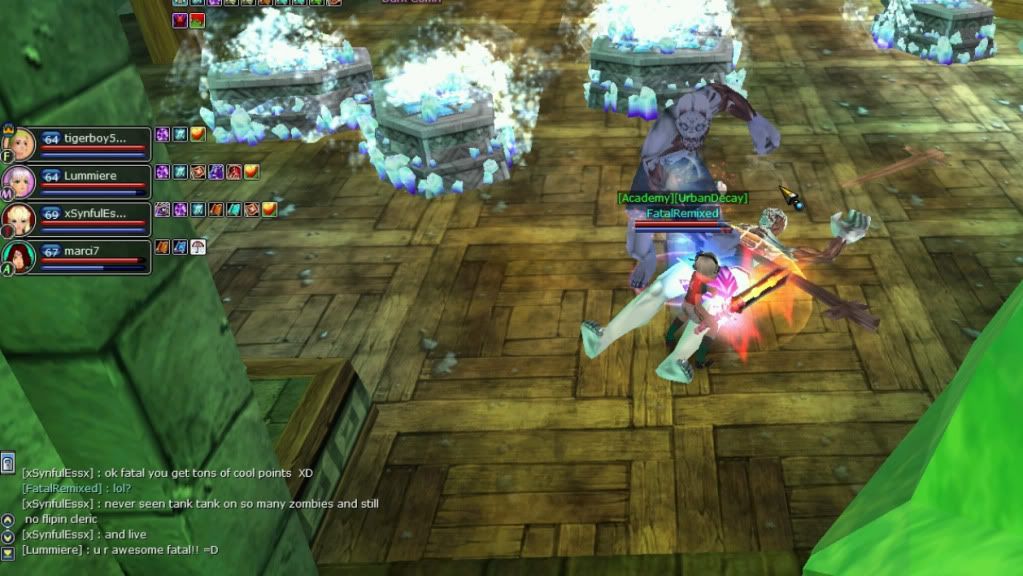
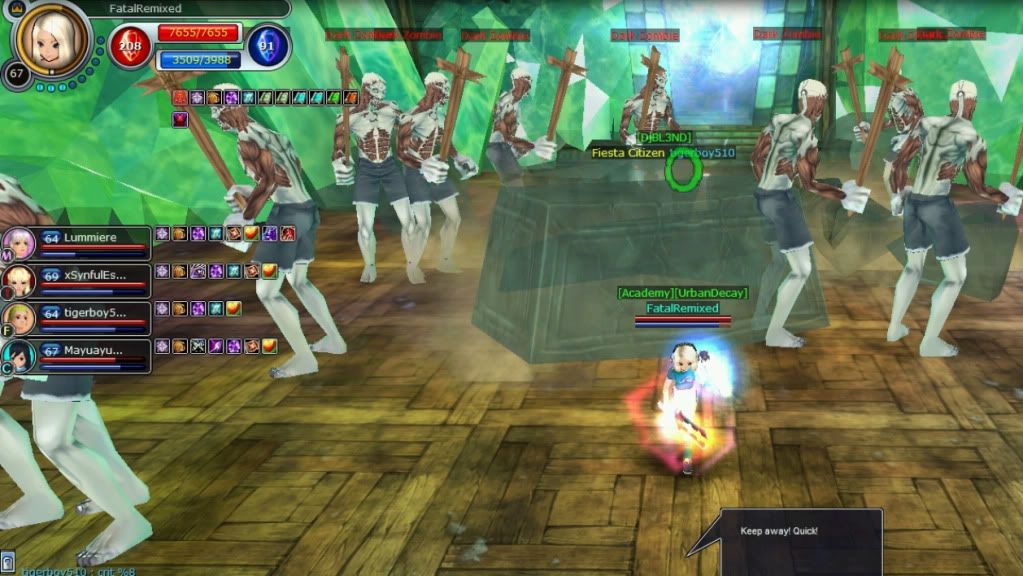
Zombies emerge from several different triggers.  Coffins, Kamaris, Chests, and Ores.  They have a quick attack as well as a high damage AOE.  I'm not 100% sure whether that AOE is M.dmg based or not, but it hurts.  A lot.  So how I tackle Zombies is usually 3-5 at a time, even without a Cleric.  This is not a case where you want to stick your chest out and pull the whole room.  If you do so and get caught by 3 or 4 simultaneous AOEs, you're done and chances are so is your party.  Zombies don't have much HP/DEF so they go down pretty quickly, especially if you have multiple 67+ Mages in your party.  It's just a matter of you, the Tank, taking that pounding and keeping aggro.  You can do Zombies without a Cleric if you're comfortable judging your ideal stone/potion usage.

Kinda my fault for not asking him to stay back....
The other Fighter actually ran towards the Zombies when the Kamaris died.
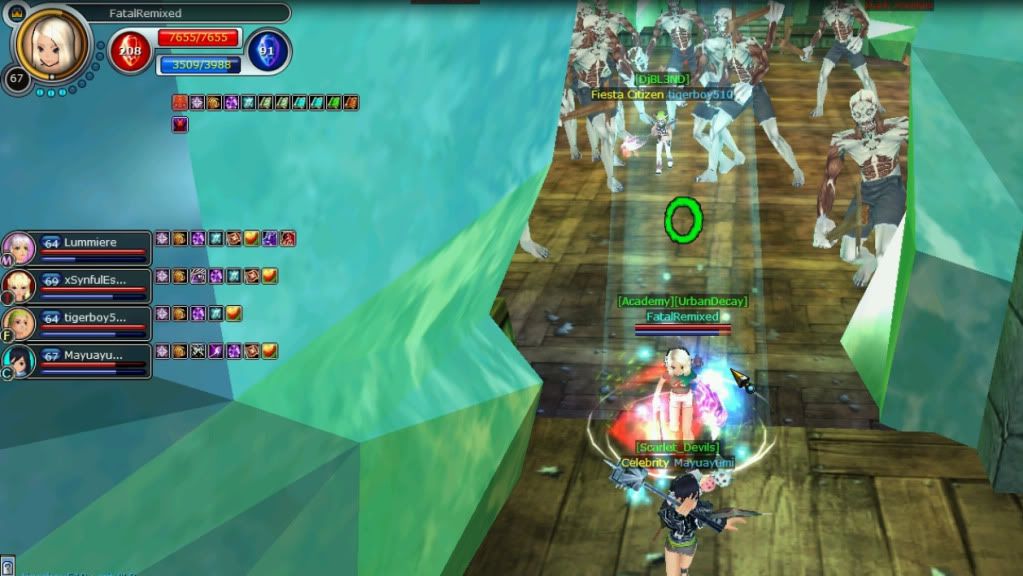
You can see him buried in here, pulling them all.  >. < !!!
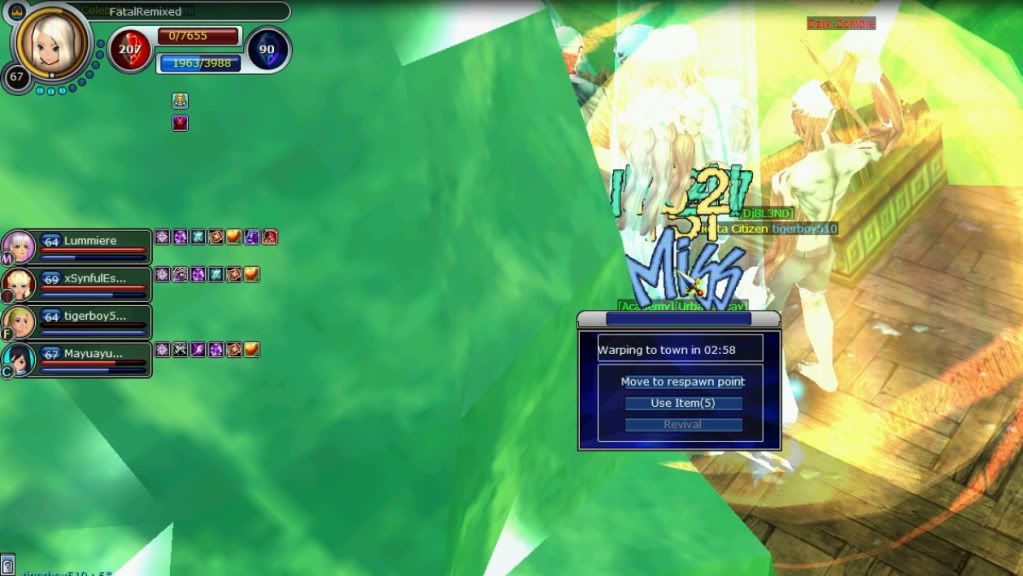
I Mocked, but wasn't able to handle that many at once.
Kamaris -
Kamaris themselves aren't much to handle, but after they die, they spawn a roomful of either Zombies, Trees, or Magic Staffs (the three drop repeats).  A word to the wise, keep other players out of that room including other Fighters.  While they can help kill the Kamaris faster, the chances that they will pull too many mobs once the Kamaris dies, is extremely high.  If the mobs happen to be Zombies, more than likely it'll end up in the party getting wiped out.  (Viewable at 5:25 of the video)

Vampire Bats -
Vampire bats are similar to Zombies, but they only show up mixed with those other fat, Piggy Bat looking guys.  Usually the fat bats have a magic "immunity" (their word, not mine) that increases their m.def tremendously.  The Vampire Bats also have a high dmg AOE so be careful where you're pulling.  Typically you want to pull stuff like this into one of the far corners awayf rom the party, with enough sightlines that you can still see them should a Bat wander off towards them; you'll be able to Kick it back to you.  Don't pull these back to the party or into the near corners if possible.  The near corners are to always be avoided because the Cleric will be unable to heal you without running into the room.  That puts the Cleric at risk as she's running, she may take a smack of that nasty AOE.

Orcs -
Orcs, like the rest mentioned above have a deadly AOE.  Just be mindful of your pulls and aggro control and you'll be alright.  No reason to panic.


Archers / Skelelton Archers / Pinkies -
Ranged mobs can cause some distress if not handled properly.  Ideally, the Tank should rush the room, pulling all the mobs back into the entryway creating a chokepoint.  At that chokepoint, you should do your aggro grabs (Mock + Demoralizing Hit) and hit Devastate.  This will disable most of the mobs you've pulled making it much easier to take them out as a collective group.  If everyone charges the room, it gets extremely chaotic as you run from mob to mob while keeping an eye on non-aggroed mobs attacking the backline.  Establish control of your party and let them know your plan ahead of time.

Boss Fights -
The Boss battles are actually pretty straight-forward.  There are three different bosses:  Jewel Golem, a Guardian Lizardman, and a Guardian Great Orc.  Of the three, the Jewel Golem is the worst and always the longest battle.  All three bosses should be pulled out of the top room and down to the bottom entry room.  This way, you avoid the waves of summoned mobs from the boss.  All summons appear in that top room, so unless you want a challenge, just pull them down. 

For the Lizardman and Great Orc, you'll notice that they have a buff when you first encounter them, there are three ways of eliminating that buff:  Purge from a Mage, destroying the light pillars in the top room, or simply waiting it out.  Purge does not have a 100% success rate vs. Bosses, so it may take the Mage several attempts before he can delete that buff.  Having him Chain Cast + Purge is a good idea.  Killing the Light Pillars isn't very hard, you just have to deal with the mobs that are in there if you didn't pull all of them at the beginning.  Waiting it out really doesn't make much sense but you can do it if you choose.  Not sure how long that buff lasts, maybe 10 minutes?


For Jewel Golem, you'll see that he has two buffs.  The first one looks like the "idle state" icon you see when you log in or change maps.  For him it's an "Unattackable Status".  What this means is he cannot be hurt by anything.  The Tank will need to maintain aggro on the Jewel Golem while the rest of the party takes out the four Light Pillars.  While the rest of the party is in the top room, there's really not much for you to do.  I would recommend spamming your debuffs as they will help ease the damage you take (Demoralizing Hit, Immobilize, and Bone Slicer).  If you choose not to spam skills for some reason, your auto-attack should be sufficient to maintain aggro over your Cleric.  If you're unsure, toss a few Kicks in here and there.  Once those Pillars come down, the party should join you on the bottom and wipe the floor clean with Jewel Golem.

All three bosses have a pretty heavy AOE attack, so if you have some weaker members it might be better serrved to just have them sit back and wait it out instead of dying, minimizing your party buff, and altering your Cleric's focus.

Tuesday, June 14, 2011

Ask Fatal - Dragon's Tomb Edition (Sub-Tanking/DD Fighter)


Now to be honest, this isn't really a facet of gameplay that I have a whole lot of experience with.  If I play as a Fighter in Dragon's Tomb, I'm typically the Tank.  While I have a DEX heavy Damage Dealing build (40 DEX, 65 STR), I always carry a Tank-like mindset.  So let's see where this goes....

Q: Fatal, what are your thoughts about Sub-Tanking?
A: As prefaced above, I really don't have much experience with it, but this is how I see it.  To me, the "Sub-Tank" should be another Damage Dealing Fighter capable of taking hits from Cornelius as well as other mobs should the main Tank go down or lose aggro to Fear or Stun.

Q: So you would only want a Fighter to Sub-Tank?  Why?  Other classes can take hits too.
A: For me, ideally a Sub-Tank should have aggro generating skills that can be quickly cast to generate aggro as I stated.  I do see a lot of players, like Archers for example, claiming they can Sub-Tank.  While it's true that they can probably take hits from Cornelius, the problem with them, and any other non-Fighter Sub-Tank, is that they have difficulty generating aggro on non-targeted mobs because they don't have specific skills made to do just that.

By the time a Fighter reaches Dragon's Tomb, he has four really good aggro grabbing skills:  Sneering Kick, Mock, Demoralizing Hit, and Slice and Dice.  As a DD Fighter, you still maintain three of those four, unless you're extremely quick to weapon swap from an Axe/2h to 1h.

While I'm not saying that other classes aren't capable of Sub-Tanking, they're just not set up, skill-wise to be as effective as another Fighter would be.  In other words, it's not an ideal situation to have a non-Fighter Sub-Tank, but if you're put into it, you adapt.

Q: So is a true "Sub-Tank" really necessary?
A: Some people seem to think so, I'm not one of them.  Again, for me, the pillars of the DT party will always be Tank, Damage Dealer, Healer.  The other two spots can be filled with whatever.  However those other two slots can be filled to make up for some weaknesses in the party.  This is where players need to come to grips with their own skill level in game.  If the three pillars are highly skilled players with good enough gear to survive a few hits from Cornelius, then the last two positions can be considered luxuries.

As a party leader, if I'm confident in the pillars, I'd look to add an Archer, I wouldn't say out of pity, but let's face it Archers, you're typically the last class parties look for.  If my party is already solid, then by all means, join up and bring a friend!

If the Fighter and DD-Mage are exceptional players, an additional Cleric isn't necessary under most circumstances, just one is sufficient.

Adding an additional Mage, or two(!), is always a nice luxury, DT runs can be remarkably fast with three Mages.

Q: So what are some reasons why Fighters Sub-Tank?
A: Typically it's because of their build, gear, and playstyle.  As a Fighter, I cannot resist doing aggro grabs, no matter the situation.  It's just in my nature to always want to pull aggro and defend my party, that's why I have a difficult time, and don't really have much experience Sub-Tanking.  If a Fighter lacks the defense to step up as the main Tank, then life as a Sub-Tank is their next best bet, but to accomplish that, it's best to fulfill that role as best you can.

Q: So in your opinion, what are the essentials for a Sub-Tank?
A: As a Sub-Tank you do need decent enough gear to withstand taking aggro should the need arise.  If you can't take the hits with just armor alone and Axe in hand, be extremely quick about switching to 1h/Shield to make up for your lack of DEF.  The Sub-Tank/DD should have a +9/+10 two-handed weapon, either 2H or an Axe.

As the Sub-Tank, you need to be cognizant of your Tank's playstyle.  Take some time early on to observe how she pulls and how well she maintains aggro on ranged mobs in particular.  You also should stagger your Devastate so not to overlap each other.  I would allow the Tank to cast that first Devastate and then time yours afterwards.  There's more on the plate for the Tank, so your role as support becomes a bit easier.  Let her cast first, then you follow when the Stun has worn off.

The Sub-Tank/DD should also immediately target mobs with the highest threat level to the backline players (Clerics, Mages, Archers), those being in order:  Nerpas, Krugers, Caravans, Flame Spirits, Fire Shellas, and Gargoyles.  Read the Tankers guide if you're unfamiliar with the status effects the mobs can inflict on you and your party.

Q: What are some options for the Sub-Tank/DD?
A: If I were put into this role, I would pretty much handle the job as a straight line DD, while keeping a watchful eye on the others.  Meaning I would Might VIT, and run a Gabriel Set at all times.  Just be careful as always when to equip your Mighty Set.  If the Tank is exceptional, it won't matter and you can equip/un-equip at any time, but just be aware your defense drops tremendously.  As far as the Gabriel Set (55 Jewelry) what it essentially does is it allows you to have an "endless" Vitality.  The cool down and duration with the Gabriel Set, so long as you have 5 points empowered in Vitality's CD and 5 points in its' Duration, will overlap each other meaning you can recast.  I think there's a slight window without the Gabriel Set, I'd have to double check to be 100% sure.

Q: So how do I handle the final fight with Cornelius?
A: As far as positioning goes, I would try to position myself on the sides of Cornelius, opposite the Cleric.  What you don't to happen is for you to get aggro when the Tank is feared and then having Cornelius immediately launch into an AOE killing you and possibly the Cleric.  So stand off to the side if possible.

Now this part, I'm also unsure of, but what I would do is I would cast Kick and Demoralizing Hit every-so-often.  I wouldn't spam it as I don't want to pull aggro from the Tank, but I want to ensure my aggro level remains higher than that of the Cleric and any of the DDs.  I'll have to field test this later with a decent Tank.

Again, if anyone else has some thoughts on this, by all means leave me a comment!

Friday, June 10, 2011

Dragon's Tomb Solo - Mage's Revenge


Whoops!  Forgot to post this... Well anyway, those of you that are subscribers to my YouTube Channel probably already saw this, but this was a follow up video to my earlier Dragon's Tomb - Mage Solo Video.

This was my first recorded solo kill of Titan.  Again, these runs were done without SparkCash.  No Extenders, Charms, (beneficial) Costumes, Weapon Skins, etc.  This was also done without the use of Blue (Set) Armors.  This Mage is still wearing the same equipment she had in the last video.

So yeah, enjoy the video, stick around for the outtake!

Thursday, June 9, 2011

Ask Fatal: Dragon's Tomb Edition (Damage Dealing - Mage)


Since our last Ask Fatal: DT Edition had to do with Tanking, let's explore the next job, Damage Dealing.  I set this one up more like a Q & A... maybe it's a bit more interesting this way? At least it's conversational =)

Q:  So what about Damage Dealing in Dragon's Tomb?  I just blow $#@!$ up right?
A:  So to speak, yes, but there's more to it than just that.

Q: But I'm a Mage, I drop Nova, I drop lag-hell (Inferno), and I'm done aren't I?  I AM MAGE I KIIIIIIIIIIIIIIILLLLLL STUFF!
A: Here's where it gets a bit more complicated than you realize.  Yes, the primary job of the Damage Dealing Mage is to unleash torrents of hell on the mobs, but the Mage also has an often overlooked secondary role, defense.

Tuesday, June 7, 2011

Ask Fatal: Dragon's Tomb Edition (Tanking)


After generating some interest in Dragon's Tomb with the release of my Mage solo videos, I decided I'd tackle some questions that I've been asked a few times.  Due to the length of these answers, I'll break these up into several postings.  Look for them in future posts.

Q: What makes up the ideal Dragon's Tomb Party?

A: That's not really as black and white as you think.  There are 3 pillars to every successful Dragon's Tomb Party: the Tank, the Damage Dealer, and the Healer.  Mindblowing right?  Of course not, we all knew that already.  But here, it can't be stressed enough.  Admittedly there are times when one player can fill multiple roles, such as Tank + DD, and that's typically a charmed, extended Mage, but per the norm, the above three roles are your foundation. Much of the success of your party is determined by everyone's awareness and ability to carry out their defined roles.  Those that are unable to can be a significant detriment and danger to the party.  While I wouldn't say to immediately kick them, it can be a time to educate them, tactfully.


Thursday, June 2, 2011

Another Chapter of Rebalance & BoE - June 1st Maintenance


There's a saying that goes: "The journey of a thousand miles starts with a single step..."  That couldn't be more fitting considering the plight of Fiesta's Archers.  After a 24 hour delay and much anticipation we received our weekly maintenance update!  The GMs hinted that we were in for something big and they didn't disappoint.  While not everything in the patch went over smoothly, for the most part, I think the majority of the players are happy this week.  Thankfully Archers did see a bit of attention this week, but I remain confident that OutSpark and OnsOnSoft aren't done tweaking the arrow flinging class just yet.

So here's a breakdown of this week's patch:

Monday, May 9, 2011

Conquering Dragon's Tomb - Clearing Mobs & MiniBoss Solos (Mage)


Doing the Dragon's Tomb instance dungeon is still one of my favorite activities in Fiesta.  I've now gone through DT with all four original classes, Trickster coming soon.  By far, my favorite class to take through DT is the Mage.  While I oftentimes leave pacing up to the Tank as I don't want to overburden him, it's quite evident that for the most part, a Tank isn't really necessary, at least not until the end.  However, getting from start to finish (just before Cornelius) is oftentimes a good measure of the worth of the Tank in your party.  Same can be said for your Cleric.


(Sorry about the audio, looks like the music I selected has been blocked.  Will have to re-work this at a later time... though I think if you go to my YouTube channel and select the video, the audio is still there.  Still, I don't want to use a workaround and get myself in trouble, so new audio is on the way!)

Monday, March 21, 2011

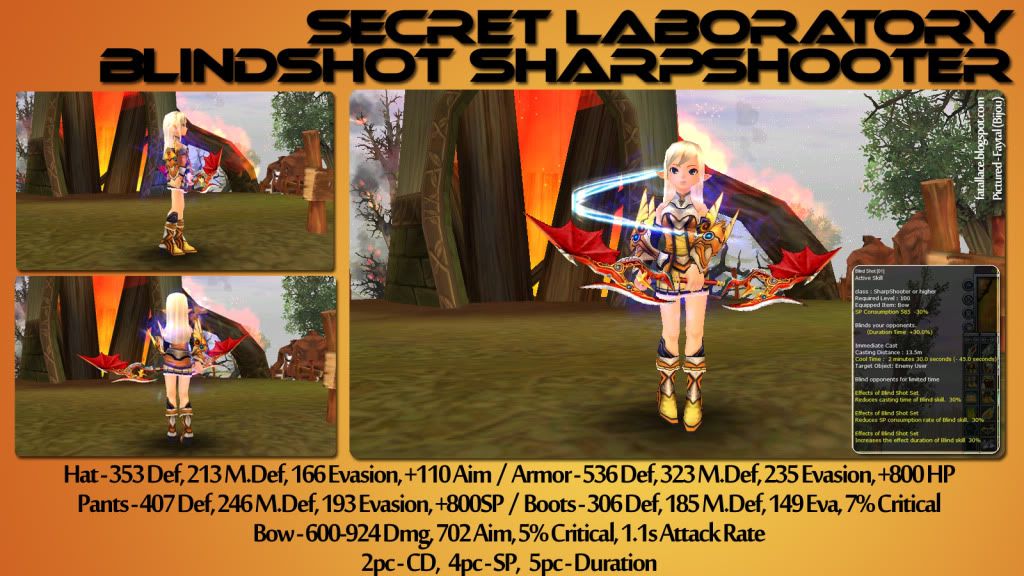
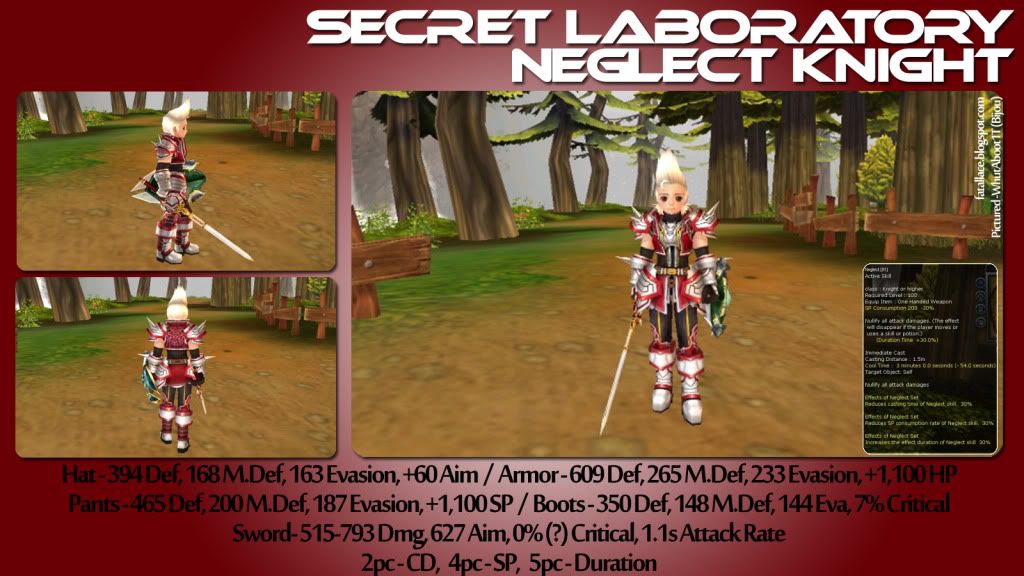
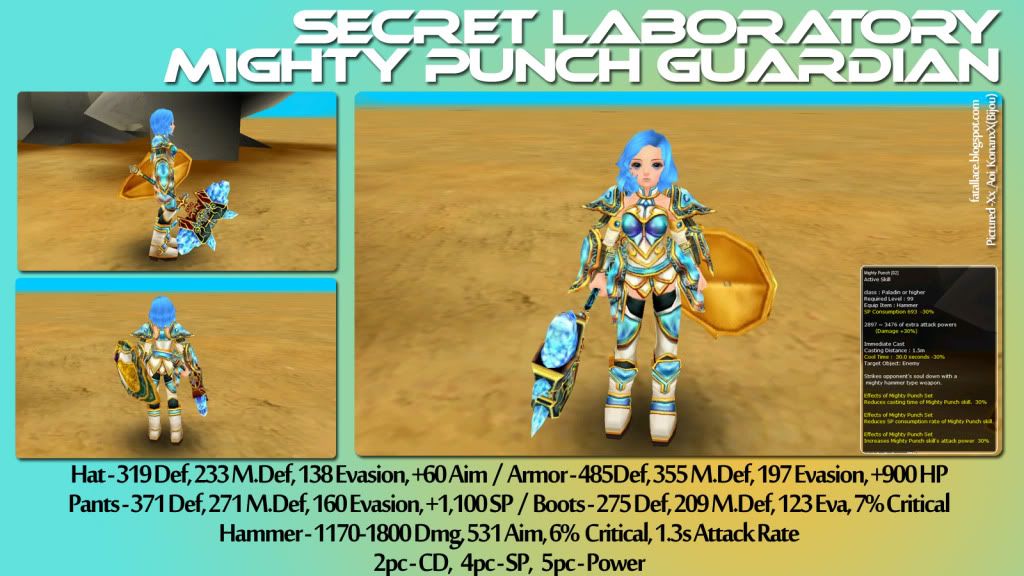
Secret Laboratory - Set Effects and Complete Set Images

Since my Leviathan's Nest Armor posting went over so well and there were multiple requests for a Secret Laboratory version, here it is!  It's taken some time to put together and as you can see, it's far from complete.  I will continue to update as I get more response from the community.

Secret Laboratory is a much more difficult run than Leviathan's Nest is, and even though you can get multiple drops in a single run, you are oftentimes stuck with nothing.  Throw in the fact that a complete set requires a weapon, and it makes it even more difficult.

I would advise you to click the images and open them up either in a new tab or a new window as the text is rather small.

 _
 _
_

..


Monday, August 2, 2010

Leviathan's Nest - Blue Set Effects and Complete Set Images

Edit:  February 22, 2011 -- Warlock Set Completed!

I have received a few requests to post the actual Effects of the sets acquired from Leviathan's Nest and also the completed set images.  We, as a guild, don't have every set completed yet, I think Warlock might be the only one incomplete, but I will post and update as I can.  Click the images to enlarge the text.

Tuesday, July 20, 2010

LN Blues - Advanced Protection Set (Guardian)

We've gotten boots before, but of course, everyone wants to see what the helms look like since these are the first visible helms at any level in Fiesta.  Akariiii was lucky enough to pick up an Advanced Protection Helmet today... and here's what it looks like... (Guardian on left of screen, HolyKnight on right)


Saturday, July 17, 2010

Advanced Trust Set Completed - Holy Knight


Just a brief update, we've now completed the Advanced Trust Set for Holy Knights.  Congratulations to SenzaMisura!

The chest piece was also the last piece to be acquired.  During our trips out to LN today, we recovered this shirt along with Protection Armor and Pants for the Guardian Class.  The Advanced Trust Set is the 3rd set we have completed so far since we began farming Leviathan's Nest a little more than a week ago.  I will post the Advanced Warrrior (Gladiator) Set later.

Beauty Shop Gender Change screenies courtesy of SenzaMisura.  Set effects forthcoming.

Friday, July 16, 2010

Mission ACCOMPLISHED Advanced Concentration Set


Well, we did it!  The SharpShooter 100 Blue Armor Set has become a reality!

First off, I wanted to thank my guildmates for all the help and support in helping me achieve this goal.  Extra thanks goes to my husband, StormyRain, thanks so much hun, this wouldn't have been possible without your help.  You've got me pixel-pretty and beaming.

Special thanks also to guildies: SenzaMisura, Akariiii, dan112, Mia_, laceface, wave92, Rehab_B and _Aim_2_Shoot_.  Thank you also to Haiyan, Spiderman, and RaidenX.

Wednesday, July 14, 2010

OPERATION: SHARPSHOOTER BLUE


Mission Objective:  Recover all 4 pieces of level 100 SharpShooter Armors buried within the bowels of Leviathan's Nest.

Secondary, Unconfirmed Objective:  Be the first female SharpShooter in Bijou to acquire all 4 pieces.  Pixel vanity must be maintained at all times.

Mission Details:  Infiltrate Leviathan's Nest via Roumen's Lighthouse.  Eliminate all opposition along the way including Leviathan's underlings King Boogy and King Crab.  Expect strong opposition in the forms of Bats, Caiman Juniors, Boogys, Alcas, Caimans, Gargoyles, Baridons, Crabs, Mad Slugs, and Snakes. No opposition should be left standing in the way of completing the mission.

Related Posts with Thumbnails